Easy St. Patrick’s Day Cookies-Festive & Fun Treats
Easy St. Patrick’s Day cookies are the perfect way to bring a little bit of Irish cheer into your kitchen without any fuss. As the emerald isle calls and St. Patrick’s Day approaches, the desire for festive treats is undeniable. But who has time for complicated baking when there’s so much celebrating to do? That’s where these delightful cookies come in! They’re designed for simplicity and maximum impact, ensuring even novice bakers can whip up a batch of green goodness. We all love a holiday that inspires delicious traditions, and these Easy St. Patrick’s Day cookies deliver just that, offering a burst of vibrant color and sweet flavor that’s sure to be a hit with everyone, from the littlest leprechauns to the grown-ups. What makes them truly special is how effortlessly they capture the spirit of the holiday with minimal effort, making them my go-to for quick and cheerful baking.
Why You’ll Love These Treats:
Quick & Simple Ingredients
Vibrant Festive Colors
Crowd-Pleasing Taste
Easy St. Patrick’s Day Cookies
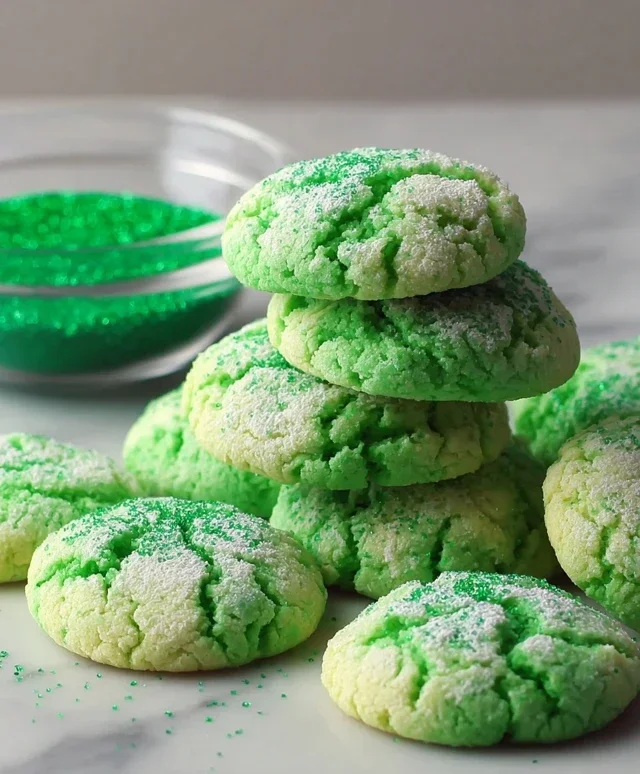
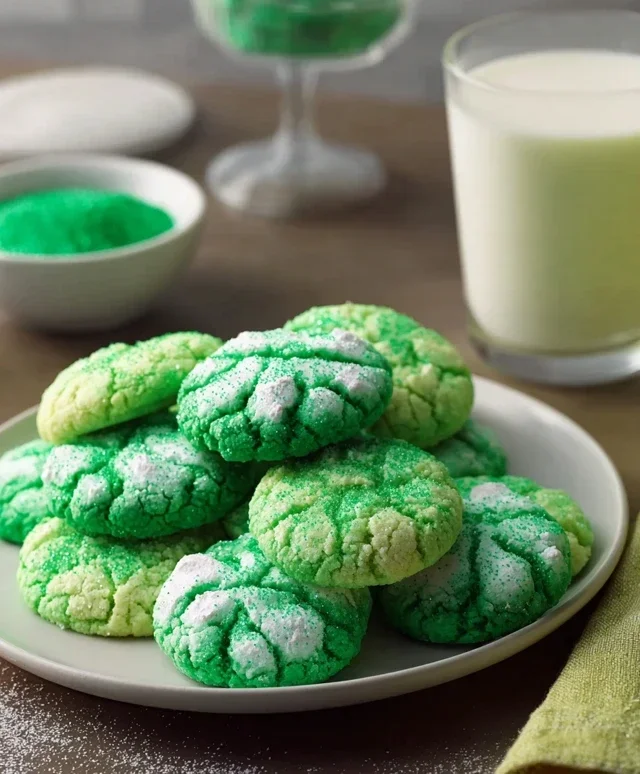
Get ready to sprinkle some emerald magic into your St. Patrick’s Day celebrations with these incredibly easy and utterly delicious cookies! Forget complicated doughs and lengthy chilling times. These cookies are your shortcut to festive fun, perfect for baking with little ones or whipping up at the last minute. They’re soft, slightly chewy, and boast a vibrant green hue that screams St. Paddy’s Day. Plus, with a light dusting of powdered sugar, they look like they’ve been kissed by a tiny leprechaun!
Ingredients:
Get Baking: Simple Steps to Green Goodness
These cookies are designed for maximum fun with minimal fuss. The secret ingredient? A box of white cake mix! It’s the foundation of our quick and easy dough, eliminating the need for creaming butter and sugar from scratch. This means you can go from pantry to oven in no time, leaving more time for the important things, like planning your St. Patrick’s Day parade route or perfecting your Irish jig.
First things first, let’s gather all our ingredients and preheat our oven. This is a crucial step to ensure even baking. Set your oven to 350°F (175°C). While the oven is warming up, grab a large mixing bowl. This is where all the magic will happen.
In your large mixing bowl, add the entire box of white cake mix. Don’t be tempted to sift it; the texture of the cake mix itself is what gives these cookies their unique soft quality. Next, crack in your two large eggs. Make sure they are at room temperature if possible, as this helps them emulsify better with the other ingredients, leading to a smoother dough. Now, pour in the 1/3 cup of vegetable oil. Vegetable oil is a fantastic choice here because it contributes to the tender crum extractb of the cookie.
Now for the fun part – color! Add the 1/4 teaspoon of Kelly green gel food coloring. Gel food coloring is essential for achieving a vibrant, true green color without adding too much liquid, which could alter the cookie’s texture. Start with 1/4 teaspoon and mix it in. If you desire a deeper, more intense green, you can carefully add another tiny drop or two, but be very conservative. You want a festive green, not a muddy one!
Using a sturdy spoon or a spatula, mix all the ingredients together until they are just combined. You’ll notice the dough starting to come together. Be careful not to overmix at this stage. Overmixing can develop the gluten in the cake mix too much, resulting in tougher cookies. You want a soft, slightly sticky dough that’s easy to handle. It will look a bit like a thick cake batter.
Once your dough is formed, it’s time to shape these little green gems. You can use a cookie scoop or simply roll the dough into small balls, about 1 inch in diameter. Place the dough balls onto a baking sheet that has been lined with parchment paper or lightly greased. Parchment paper is highly recommended as it prevents sticking and makes cleanup a breeze. Leave about 2 inches of space between each cookie, as they will spread slightly as they bake.
Here’s another little trick to get that beautiful, slightly cracked surface and a lovely cookie shape: gently flatten each dough ball with the palm of your hand or the bottom of a glass. You don’t need to press them completely flat, just a gentle press will do. This helps them bake more evenly and creates a nice texture.
Bake the cookies in your preheated oven for 9-12 minutes. The exact baking time will depend on your oven and the size of your cookies. You’re looking for the edges to be lightly golden, and the centers to appear set, not wet or gooey. They will still look a little soft in the middle when you take them out, and that’s perfectly okay. They will continue to firm up as they cool on the baking sheet. This is key to achieving that desirable chewy texture.
After baking, let the cookies cool on the baking sheet for about 5 minutes. This allows them to set up properly before you move them. Then, carefully transfer them to a wire rack to cool completely. Patience is a virtue, especially when it comes to cookies! Letting them cool fully ensures they maintain their shape and don’t crum extractble.
While your cookies are cooling, let’s prepare the simple, yet effective, decorative finish. In a small bowl, combine the 3 tablespoons of granulated sugar and the 6 tablespoons of powdered sugar. You can also add a pinch of edible glitter at this stage if you’re feeling extra fancy! This sugar mixture will give your cookies a lovely, subtle sweetness and a frosted appearance, reminiscent of a fresh snowfall (or maybe a leprechaun’s lucky dust!).
Once the cookies are completely cool, it’s time for the final touch. Gently roll each cookie in the prepared sugar mixture, ensuring they are lightly coated. You can also simply dust them generously with the sugar mixture using a sieve. This adds a delightful sweetness and a beautiful finish that’s perfect for any St. Patrick’s Day gathering. Arrange your finished cookies on a festive platter and get ready to enjoy the luck of the Irish! These are best enjoyed within a few days, but trust me, they won’t last that long!
Conclusion:
There you have it – a truly delightful and incredibly simple way to bring some festive cheer to your St. Patrick’s Day celebrations with these Easy St. Patrick’s Day Cookies! What makes this recipe so fantastic is its minimal ingredient list, straightforward steps, and the sheer joy it brings. Whether you’re a seasoned baker or a complete novice, you’ll find these cookies a breeze to whip up. The soft, buttery texture combined with the vibrant green hue and fun decorations makes them perfect for sharing at parties, gifting to friends, or simply enjoying with a cup of tea. Don’t hesitate to get creative with your decorating; think sprinkles, edible glitter, or even a simple drizzle of white chocolate for a “pot of gold” effect!
These cookies are wonderfully versatile. They make a fantastic addition to any St. Patrick’s Day dessert table, alongside brownies, cupcakes, or even a traditional Irish soda bread. For a fun activity with kids, let them take charge of the decorating once the cookies have cooled. You can also easily adapt the flavor by adding a touch of mint extract to the dough for an extra burst of green goodness!
So, don’t wait! Gather your ingredients and give these Easy St. Patrick’s Day Cookies a try. I’m confident they’ll become a new favorite for your St. Patrick’s Day traditions. Happy baking and Happy St. Patrick’s Day!
Frequently Asked Questions:
Can I make these cookies ahead of time?
Absolutely! These cookies store very well. Once completely cooled, you can store them in an airtight container at room temperature for up to 3-4 days. For longer storage, you can freeze unfrosted cookies for up to 2 months.
What kind of green food coloring should I use?
For the most vibrant and consistent green color, I recommend using gel food coloring. Start with a small amount and add more until you achieve your desired shade of green. Liquid food coloring can sometimes alter the dough’s consistency.
Can I omit the food coloring if I prefer?
Yes, you certainly can! The green food coloring is purely for aesthetic purposes to make them festive for St. Patrick’s Day. The cookies will still taste delicious and have a lovely buttery flavor even without the added color.
Easy St. Patrick’s Day Cookies
Simple and festive green cookies perfect for St. Patrick’s Day celebrations.
Ingredients
-
1 box (15.25 oz) white cake mix (about 3 cups)
-
2 large eggs
-
1/3 cup vegetable oil
-
1/4 teaspoon Kelly green gel food coloring
-
3 tablespoons granulated sugar
-
6 tablespoons powdered sugar
Instructions
-
Step 1
Preheat your oven to 350°F (175°C). Line baking sheets with parchment paper. -
Step 2
In a large bowl, combine the white cake mix, eggs, and vegetable oil. Mix until just combined. -
Step 3
Add the Kelly green gel food coloring and mix until the dough is evenly colored. -
Step 4
Drop rounded tablespoons of dough onto the prepared baking sheets, about 2 inches apart. -
Step 5
Gently flatten each cookie with the bottom of a glass dipped in granulated sugar. Then, sprinkle a little more granulated sugar on top. -
Step 6
Bake for 8-10 minutes, or until the edges are lightly golden and the centers are set. -
Step 7
Let the cookies cool on the baking sheets for a few minutes before transferring them to a wire rack to cool completely. Once cooled, dust lightly with powdered sugar for a snowy effect.
Important Information
Nutrition Facts (Per Serving)
It is important to consider this information as approximate and not to use it as definitive health advice.
Allergy Information
Please check ingredients for potential allergens and consult a health professional if in doubt.