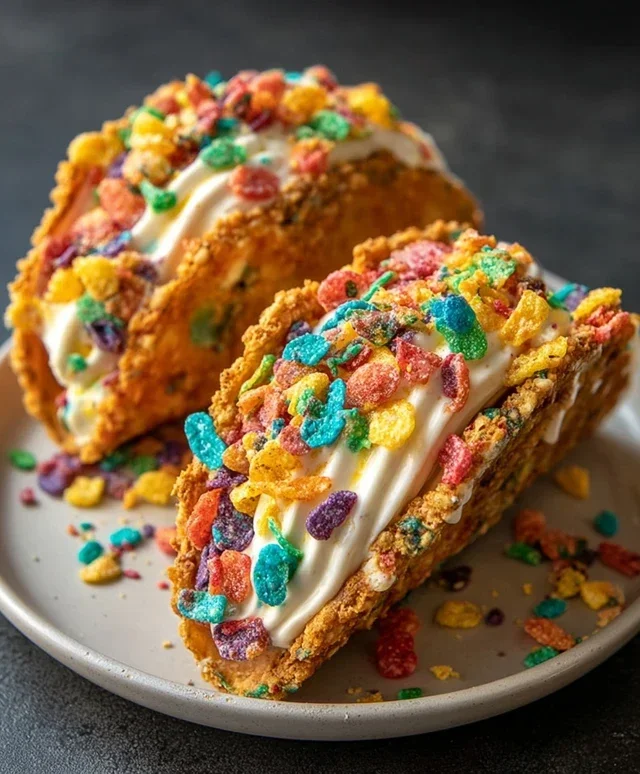
Fruity Pebbles Cheesecake Tacos-Sweet Treat
Fruity Pebbles Cheesecake Tacos are about to become your new obsession! Imagin extracte this: the vibrant crunch of your favorite childhood cereal meeting the creamy decadence of cheesecake, all nestled within a crisp, golden taco shell. It sounds utterly magical, doesn’t it? We’re not just talking about a dessert here; we’re talking about an experience that ignites pure joy. People adore these Fruity Pebbles Cheesecake Tacos because they tap into that nostalgic sweet spot while offering a sophisticated yet playful flavor profile. What truly makes these treats special is the unexpected harmony of textures and tastes. The tartness of the cream cheese filling perfectly balances the sugary sweetness of the cereal, and the delightful crunch of the taco shell provides the perfect vessel for this explosion of fruity, creamy goodness. Get ready to wow your friends, impress your family, or simply treat yourself to a moment of pure, unadulterated bliss with these unforgettable Fruity Pebbles Cheesecake Tacos.
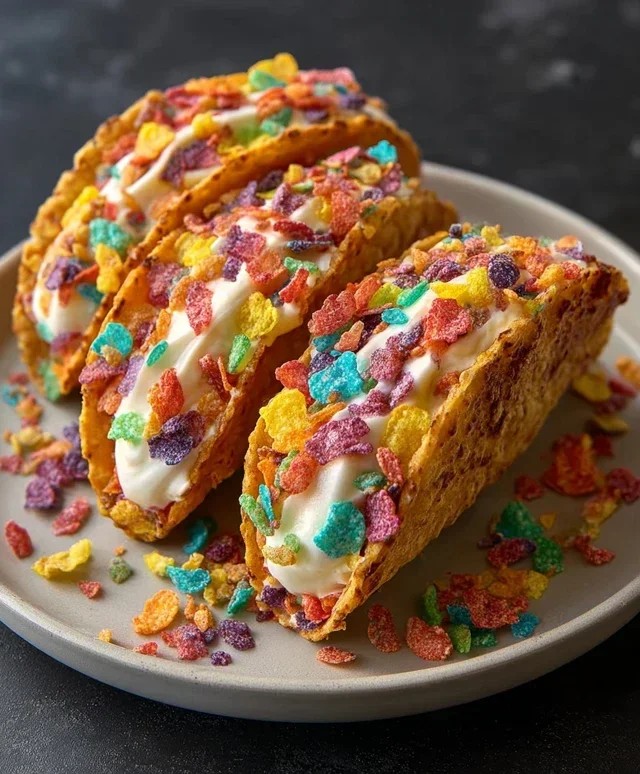
Fruity Pebbles Cheesecake Tacos
Get ready for a flavor explosion that’s as fun to make as it is to eat! These Fruity Pebbles Cheesecake Tacos are a vibrant, sweet, and utterly delightful dessert that’s sure to impress. We’re taking the classic creamy goodness of cheesecake and giving it a playful, crunchy twist, all nestled into a delightful taco shell. Forget traditional desserts; it’s time to dive into a world of color and taste! These are perfect for parties, a special treat, or just when you need a burst of joy. The combination of the sweet, slightly tangy cheesecake filling with the crunchy, fruity cereal shell is simply irresistible. Let’s get started!
Ingredients:
Crafting the Fruity Pebbles Taco Shells
The foundation of our delicious tacos starts with creating the perfect crunchy shell. This is where the magic of Fruity Pebbles truly shines.
Whipping Up the Creamy Cheesecake Filling
While our taco shells are chilling, it’s time to prepare the luscious cheesecake filling that will be the heart of our dessert tacos.
Assembling Your Fruity Pebbles Cheesecake Tacos
The grand finnon-alcoholic ale! It’s time to bring all the elements together for a truly spectacular dessert.
Enjoy every colorful, crunchy, and creamy bite of your homemade Fruity Pebbles Cheesecake Tacos!
Conclusion:
There you have it – a recipe for the most delightful Fruity Pebbles Cheesecake Tacos! This dessert truly is a showstopper, blending the creamy indulgence of cheesecake with the fun, crunchy texture and vibrant flavors of Fruity Pebbles cereal. It’s incredibly easy to make and offers a fantastic way to elevate your dessert game for any occasion, from a casual get-together to a special celebration. The combination of sweet, tangy cheesecake filling nestled in a crisp taco shell, adorned with a colorful cereal crust, makes for an unforgettable treat that appeals to both kids and adults.
These cheesecake tacos are incredibly versatile. I love serving them as a fun dessert after a casual dinner, or even as a playful brunch treat. They pair wonderfully with a glass of cold milk, a dollop of whipped cream, or even a fresh berry compote for an extra burst of flavor.
Don’t be afraid to get creative with your own variations! You could try different cereal flavors for the crust, perhaps a hint of lemon zest in the cheesecake filling, or even a drizzle of white chocolate. The possibilities are endless when it comes to making these Fruity Pebbles Cheesecake Tacos your own.
I truly hope you give this recipe a try. It’s a guaranteed crowd-pleaser and so much fun to assemble and devour. Let me know how yours turn out!
Frequently Asked Questions:
Can I make the taco shells ahead of time?
Yes, absolutely! You can prepare the taco shells a day in advance and store them in an airtight container at room temperature. Just be sure they are completely cooled before storing to prevent them from becoming soggy.
What if I don’t have Fruity Pebbles cereal?
No problem at all! You can substitute with other colorful, crunchy cereals. Cinnamon Toast Crunch, Trix, or even Cap’n Crunch would make for delicious variations on the crust. Just aim for cereals that hold up well to being crushed.
How should I store leftover Fruity Pebbles Cheesecake Tacos?
For the best texture, it’s recommended to store any leftovers in an airtight container in the refrigerator. While the taco shell might soften slightly over time, the cheesecake filling will remain wonderfully creamy. It’s best enjoyed within 2-3 days.
Fruity Pebbles Cheesecake Tacos
A fun and colorful dessert featuring a sweet fruity cereal crust filled with creamy cheesecake and topped with whipped cream and more cereal.
Ingredients
-
3 cups colorful fruity cereal
-
1/2 cup unsalted butter, melted
-
8 oz cream cheese, softened
-
1/2 cup powdered sugar, sifted
-
1 tsp pure vanilla extract
-
1 cup whipped cream
-
Additional fruity cereal for garnish
Instructions
-
Step 1
In a bowl, combine 3 cups of colorful fruity cereal with the melted unsalted butter. Stir until the cereal is evenly coated. -
Step 2
Press the cereal mixture into 6 mini muffin tins or taco molds, forming the ‘taco shells’. Bake at 350°F (175°C) for 8-10 minutes, or until lightly golden and set. Let cool completely. -
Step 3
In a separate bowl, beat the softened cream cheese with the sifted powdered sugar until smooth and creamy. -
Step 4
Stir in the pure vanilla extract into the cream cheese mixture until well combined. -
Step 5
Gently fold in the whipped cream into the cream cheese mixture until just combined, being careful not to overmix. -
Step 6
Spoon the cheesecake filling into the cooled fruity cereal taco shells. -
Step 7
Garnish each taco with additional fruity cereal before serving.
Important Information
Nutrition Facts (Per Serving)
It is important to consider this information as approximate and not to use it as definitive health advice.
Allergy Information
Please check ingredients for potential allergens and consult a health professional if in doubt.