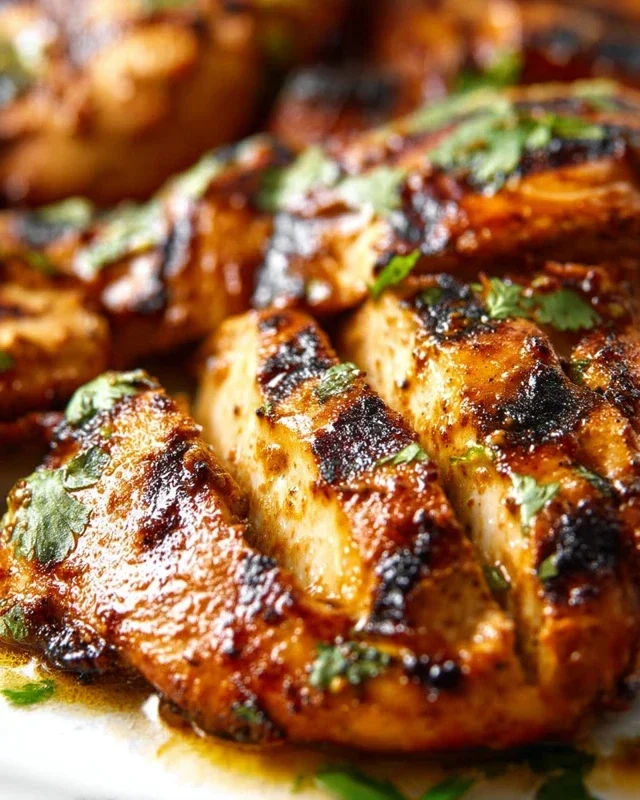
Cherry Dr Pepper Grilled Chicken Recipe-Sweet & Smoky
Cherry Dr. Pepper grilled chicken is a flavor explosion waiting to happen on your grill! Forget bland, boring chicken; this recipe takes it to a whole new level of deliciousness. There’s a reason why this dish has become a backyard barbecue legend. It’s the perfect marriage of sweet, tangy, and smoky, offering a truly unique taste experience that’s impossible to resist. The secret lies in the magical marinade, where the distinctive cherry and subtle spice notes of Dr. Pepper meld beautifully with the sweetness of cherry, creating a sticky, caramelized glaze that coats every succulent bite. Imagin extracte tender, juicy chicken kissed by the flames, infused with this incredible flavor – it’s pure summer perfection and guaranteed to be a crowd-pleaser. Get ready to impress everyone with your culinary prowess and this unforgettable Cherry Dr. Pepper grilled chicken.
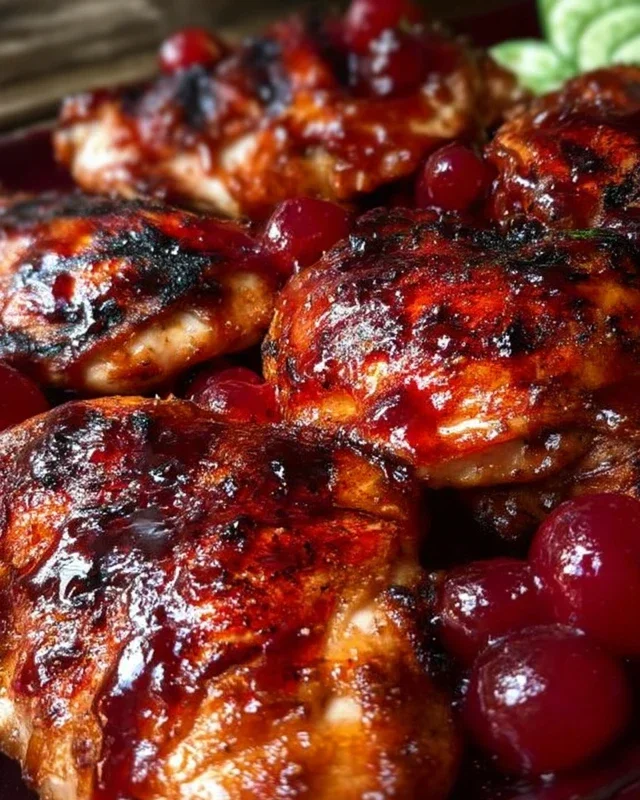
Cherry Dr. Pepper Grilled Chicken
There’s something truly magical about the smoky char of grilled chicken infused with a sweet and tangy glaze. And when that glaze involves a beloved soda with a hint of cherry, well, you’ve got a recipe for pure summer bliss. My Cherry Dr. Pepper Grilled Chicken is a guaranteed crowd-pleaser, perfect for backyard barbecues, weeknight dinners, or any occasion where you want to impress without a lot of fuss. The secret lies in the simple yet incredibly effective marinade and glaze that transforms ordinary chicken into something extraordinary.
The combination of Cherry Dr. Pepper, ketchup, and brown sugar creates a sticky, caramelized coating that is utterly irresistible. The tomato paste adds depth, Worcestershire sauce brings a savory umami, and the spices provide a gentle warmth and complexity. It’s a flavor profile that’s both familiar and exciting, making it a go-to for many of my grilling adventures. This recipe is forgiving, too. Even if you’re a novice griller, you’ll find it easy to follow and the results will be spectacular. Let’s get started on creating this delicious dish!
Ingredients:
Preparing the Glaze and Marinade
The first step to achieving perfectly flavored chicken is to create our incredibly flavorful Cherry Dr. Pepper glaze. This glaze will serve double duty, acting as both a marinade to tenderize and infuse the chicken with flavor, and as a basting sauce to build that beautiful sticky coating as it grills.
In a medium saucepan, combine the 12 oz can of Cherry Dr. Pepper, 1 cup of ketchup, the 6 oz can of tomato paste, 1 cup of brown sugar, 1 tablespoon of Worcestershire sauce, 1/2 teaspoon of onion powder, 1/2 teaspoon of black pepper, 1/2 teaspoon of liquid smoke, 1/2 teaspoon of chili powder, and 1 teaspoon of minced garlic. Stir all of these ingredients together until they are well combined.
Now, place the saucepan over medium heat on your stovetop. We want to bring this mixture to a gentle simmer. As it heats, continue to stir occasionally to ensure the brown sugar dissolves completely and that the mixture doesn’t stick to the bottom of the pan. Once it starts to simmer, reduce the heat to low and let it cook for about 15-20 minutes, stirring periodically. The goal here is to allow the flavors to meld and for the sauce to thicken slightly. It should reach a consistency that will coat the back of a spoon. This thickened glaze is going to be a game-changer for your grilled chicken.
Marinating the Chicken
While the glaze is simmering and thickening, it’s time to prepare our chicken. If you’re using a whole chicken cut into pieces, ensure all the pieces are separated and ready to go. If you’re using a package of dark meat chicken, make sure it’s thawed and any excess moisture is patted dry with paper towels. This step is important for even cooking and better browning.
Once your chicken is prepped, place the pieces into a large resealable plastic bag or a non-reactive bowl. Now, take about half of the thickened Cherry Dr. Pepper glaze you made earlier and pour it over the chicken. Make sure to coat each piece thoroughly. For the best results, I like to let the chicken marinate in the refrigerator for at least 2 hours, but ideally, for 4-6 hours, or even overnight. The longer it marinates, the deeper the flavor will penetrate into the chicken. Remember to discard the leftover marinade after you remove the chicken for grilling; never reuse marinade that has touched raw meat.
Grilling the Chicken
Now for the fun part! Preheat your grill to medium-high heat. It’s important to get your grill nice and hot so you can achieve a good sear on the chicken and prevent it from sticking. While the grill is heating, take the chicken out of the marinade and let any excess drip off. Discard the used marinade.
Sprinkle the chicken pieces generously with 3 teaspoons of seasoning salt and 1 teaspoon of paprika. This adds another layer of flavor and helps create a beautiful, crispy exterior. Arrange the seasoned chicken pieces on the hot grill grates, ensuring you leave some space between each piece for even cooking.
The Grilling Process and Glazing
Close the grill lid and cook the chicken for about 6-8 minutes per side, depending on the size of the pieces. You’re looking for nice grill marks and for the chicken to start to cook through. During this time, keep an eye on it, as sugars in the glaze can cause flare-ups. If you notice flames getting too high, move the chicken to a cooler part of the grill or briefly lift the lid to let the flames die down.
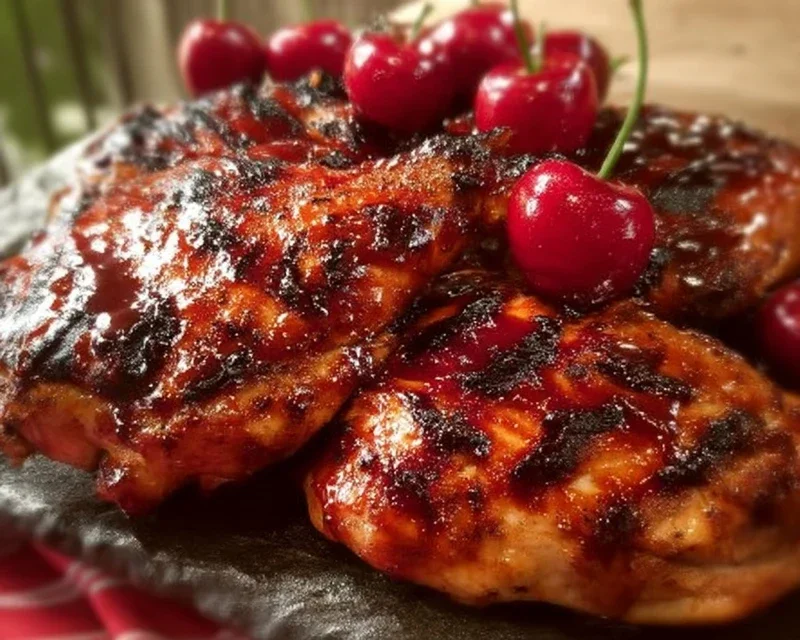
After the initial grilling, it’s time to start basting with the reserved glaze. Brush a generous layer of the remaining Cherry Dr. Pepper glaze onto both sides of the chicken pieces. Continue grilling, turning the chicken every few minutes and basting each time, for another 10-15 minutes, or until the chicken is cooked through and the glaze has caramelized to a beautiful, sticky finish. The internal temperature of the chicken should reach 165°F (74°C). Be careful not to overcook it, as this can lead to dry chicken. The glaze will become wonderfully sticky and slightly charred, creating a fantastic sweet and savory crust.
Resting and Serving
Once the chicken is cooked to perfection and has that gorgeous, caramelized glaze, remove it from the grill. It’s crucial to let the chicken rest for at least 5-10 minutes before serving. This allows the juices to redistribute throughout the meat, ensuring that every bite is moist and tender. While the chicken is resting, you can give any remaining glaze a final quick simmer on the stovetop if you want to thicken it further for serving as a dipping sauce. Serve your delicious Cherry Dr. Pepper Grilled Chicken hot, perhaps with some classic barbecue sides like coleslaw, potato salad, or grilled corn on the cob. Enjoy the explosion of flavors!
Conclusion:
There you have it – a simple yet incredibly flavorful way to elevate your weeknight grilling with Cherry Dr. Pepper Grilled Chicken! This recipe is a winner because it combines the sweet, tangy notes of cherry and Dr. Pepper with the savory goodness of grilled chicken, creating a sticky, caramelized glaze that’s utterly irresistible. It’s surprisingly easy to whip up, making it perfect for begin extractners and seasoned grill masters alike. The minimal prep time means you can spend more time enjoying the sunshine and less time in the kitchen. The resulting chicken is incredibly moist and bursting with a unique, crowd-pleasing flavor profile that’s a definite departure from your average grilled fare.
For serving, this Cherry Dr. Pepper Grilled Chicken pairs beautifully with classic BBQ sides like coleslaw, potato salad, or corn on the cob. It’s also fantastic served over a bed of rice or nestled into sliders for a fun, casual meal. Don’t be afraid to experiment! You can add a pinch of cayenne pepper to the marinade for a little heat, or swap the cherry Dr. Pepper for regular Dr. Pepper and add fresh cherries to the glaze for an even more intense cherry flavor. I truly encourage you to give this recipe a try; I think you’ll be delighted with the delicious results!
Frequently Asked Questions:
Can I make the Cherry Dr. Pepper glaze ahead of time?
Absolutely! You can prepare the glaze up to 2 days in advance and store it in an airtight container in the refrigerator. Just bring it to room temperature and give it a good whisk before using it for marinating or basting.
What kind of chicken works best for this recipe?
This recipe is incredibly versatile. While boneless, skinless chicken thighs are fantastic because they stay moist and soak up the flavor beautifully, chicken breasts will also work well, though you’ll want to be careful not to overcook them to prevent dryness.
Cherry Dr. Pepper Grilled Chicken
A sweet and tangy grilled chicken recipe featuring a glaze made with Cherry Dr. Pepper, ketchup, brown sugar, and a blend of savory spices.
Ingredients
-
1 – 12 oz can Cherry Dr. Pepper
-
1 Cup Ketchup
-
1 – 6 oz. can tomato paste
-
1 Cup Brown Sugar
-
1 Tablespoon Worcestershire sauce
-
1/2 tsp. Onion Powder
-
1/2 tsp. black pepper
-
1/2 tsp. liquid smoke
-
1/2 tsp. Chili Powder
-
1 tsp. minced garlic
-
1 whole chicken cut up OR 1 package of dark meat chicken cut up about 12 pieces of chicken
-
3 teaspoons Seasoning Salt
-
1 tsp Paprika
Instructions
-
Step 1
In a medium saucepan, combine Cherry Dr. Pepper, ketchup, tomato paste, brown sugar, Worcestershire sauce, onion powder, black pepper, liquid smoke, chili powder, minced garlic, paprika, and seasoning salt. Stir well. -
Step 2
Bring the mixture to a simmer over medium heat, stirring occasionally. Reduce heat to low and let it simmer for 15-20 minutes, or until the sauce has thickened. Stir frequently to prevent scorching. -
Step 3
Preheat your grill to medium-high heat. Clean and oil the grill grates. -
Step 4
Pat the chicken pieces dry and season them lightly with additional seasoning salt and pepper, if desired. -
Step 5
Place the chicken on the preheated grill. Grill for about 15 minutes per side, or until cooked through and internal temperature reaches 165°F (74°C). -
Step 6
During the last 10-15 minutes of grilling, generously brush the chicken with the prepared Cherry Dr. Pepper glaze. Continue to grill, turning and basting, until the glaze is caramelized and sticky. -
Step 7
Remove chicken from the grill and let it rest for a few minutes before serving. Serve with extra glaze on the side.
Important Information
Nutrition Facts (Per Serving)
It is important to consider this information as approximate and not to use it as definitive health advice.
Allergy Information
Please check ingredients for potential allergens and consult a health professional if in doubt.