Easy French Dip Squares Recipe
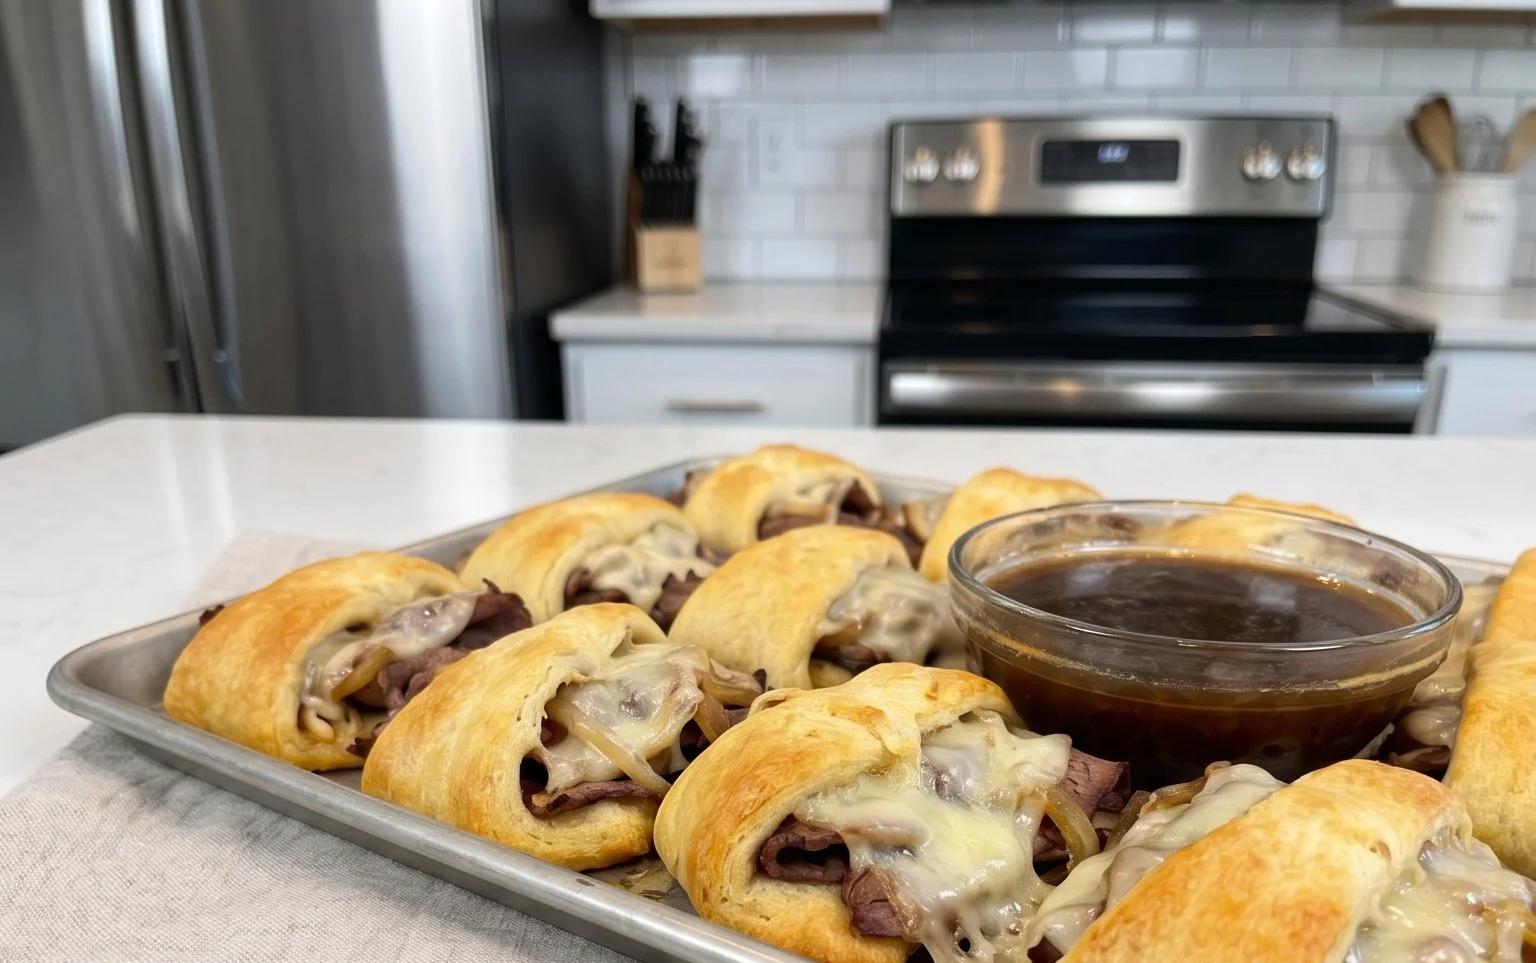
French Dip Squares are about to become your new favorite comfort food obsession. Forget the messy sandwiches and the drippy au jus; we’ve taken everything you adore about the classic French Dip and transformed it into an unbelievably easy and utterly delicious square. Imagin extracte tender, thinly sliced roast beef nestled in a fluffy, cheesy bread base, all baked to golden perfection. The magic truly happens when you dip these savory bites into a rich, deeply flavorful broth – that quintessential French Dip experience, now in a perfectly portioned, delightful package. These French Dip Squares are ideal for game nights, casual gatherings, or simply when you crave that soul-satisfying taste of slow-cooked beef and savory goodness without all the fuss. Get ready to impress yourself and everyone you share them with!
French Dip Squares
Looking for a way to capture all the deliciousness of a classic French Dip sandwich but in a fun, bite-sized, and incredibly easy-to-make format? Well, you’ve found it! These French Dip Squares are a revelation. They take all the savory, cheesy, beefy goodness and bake it into convenient, handheld squares that are perfect for appetizers, game nights, or even a quick and satisfying lunch. The best part? They’re ridiculously simple to assemble, making them a go-to recipe when you need something impressive without a lot of fuss. Imagin extracte flaky crescent roll dough encasing tender roast beef and gooey Swiss cheese, all brought together with a savory onion-garlic butter sauce, and served with a warm beef broth for that signature dip. Get ready to impress yourself and everyone who tries these!
Ingredients:
Cooking Instructions:
The beauty of these French Dip Squares lies in their simplicity. We’re going to take readily available ingredients and transform them into something truly special with just a few easy steps. Let’s get started!
Phase 1: Preparing the Savory Base
First things first, let’s preheat your oven to 375°F (190°C). While the oven is warming up, grab an 8×8 inch baking dish. We’re going to lightly grease this dish to prevent any sticking and ensure our squares come out cleanly. You can use a little butter or cooking spray for this. Now, open up both cans of refrigerated crescent roll dough. Carefully unroll each can and separate the dough into its individual triangles. We’re going to press these triangles together in the prepared baking dish, overlapping them slightly, to form a solid, even layer. You want to create a nice base for our flavorful filling. Gently press the seams together to seal them as much as possible. Don’t worry if it’s not perfectly uniform; the dough will puff up and meld together during baking. This forms the bottom layer of our delicious squares.
In a medium bowl, it’s time to create the magic that binds everything together. We’ll start by combining the melted butter, the entire packet of dry onion soup mix, the Worcestershire sauce, and the garlic powder. Whisk these ingredients together thoroughly until everything is well combined. This mixture will be incredibly flavorful, infusing the roast beef and cheese with that classic French Dip essence. The dry onion soup mix provides a fantastic savory depth, the Worcestershire sauce adds a touch of tang and umami, and the garlic powder brings that essential aromatic kick.
Phase 2: Assembling and Baking
Now that our savory base is ready, let’s layer on the star ingredients. Take your deli-sliced roast beef and carefully arrange it evenly over the crescent roll dough in the baking dish. Try to cover the entire surface as much as possible. Don’t be afraid to overlap the slices slightly. The more beef, the better, right? Once the roast beef is in place, it’s time for the cheese! Sprinkle the grated Swiss cheese evenly over the roast beef. Swiss cheese is the traditional choice for French Dip, and its nutty, slightly sweet flavor complements the beef perfectly. Make sure to get an even coating of cheese; it will melt into a glorious, gooey layer that holds everything together.
With our filling in place, it’s time to bring it all together with that delicious butter mixture we prepared earlier. Drizzle the onion soup butter mixture evenly over the roast beef and Swiss cheese. Use a spoon or a pastry brush to ensure that the flavor gets distributed across the entire surface. This step is crucial for infusing all the layers with that incredible savory flavor during baking. Think of it as a flavor bath for your French Dip Squares!
Now it’s time to bake these beauties! Carefully place the baking dish into your preheated oven. We’re going to bake for approximately 20-25 minutes, or until the crescent roll dough is golden brown and puffed up, and the Swiss cheese is melted and bubbly. Keep an eye on them towards the end of the baking time, as ovens can vary. You want that perfect golden hue, indicating that the dough is cooked through and delightfully crispy.
Phase 3: Serving the Dip
While your French Dip Squares are baking to perfection, it’s time to prepare the essential dipping component. Pour the 1 cup of beef broth into a small, microwave-safe bowl or a small saucepan. If you’re using a microwave, heat it on high for about 60-90 seconds, or until it’s nice and hot. If you’re using a saucepan, heat it over medium heat until it’s steaming. This warm beef broth is what makes these squares truly a French Dip experience. It’s the perfect liquid for that signature dip, adding another layer of rich, savory flavor.
Once your French Dip Squares are out of the oven and look absolutely irresistible, let them cool in the baking dish for about 5-10 minutes. This resting period is important because it allows the cheese to set slightly and makes them easier to cut. Using a sharp knife or a pizza cutter, carefully cut the baked crescent roll mixture into individual squares. The size is up to you, but typically, cutting them into 9 or 12 squares works well. Arrange the squares on a serving platter, and place the warm beef broth in a small bowl alongside for dipping. Serve immediately and watch them disappear! These are best enjoyed warm, so don’t let them sit out for too long before diving in.

Conclusion:
So there you have it – a simple yet utterly delicious way to enjoy the classic flavors of French Dip, all baked into convenient, crowd-pleasing French Dip Squares! I truly believe these squares are a game-changer for entertaining or even just a satisfying weeknight meal. They’re incredibly flavorful thanks to the tender roast beef and rich au jus, and the pastry puff makes them wonderfully satisfying. The beauty of this recipe lies in its ease; you get all that iconic French Dip taste with minimal fuss. Don’t hesitate to give these French Dip Squares a try – I promise you won’t be disappointed!
Serve these warm squares with extra au jus for dipping, of course! They are fantastic on their own, but also pair wonderfully with a crisp green salad or some seasoned fries. For variations, consider adding caramelized onions or a sprinkle of Gruyere cheese before baking for an extra layer of indulgence. You could even switch out the roast beef for thinly sliced turkey or beef ham for a delightful twist.
Frequently Asked Questions:
Can I make French Dip Squares ahead of time?
Yes, you absolutely can! You can prepare the entire dish up to the baking stage and refrigerate it. When you’re ready to bake, simply remove it from the refrigerator about 20-30 minutes before baking to take the chill off, and then bake as directed, adding a few extra minutes to the baking time if needed.
What kind of roast beef is best for these squares?
For the best flavor and tenderness, I recommend using thinly sliced deli roast beef or leftover slow-cooked roast beef. The key is to have it sliced thinly so it heats through quickly and evenly within the pastry.
Can I freeze leftover French Dip Squares?
While they are best enjoyed fresh, you can freeze cooled, leftover French Dip Squares. Wrap them individually or store them in an airtight container. To reheat, bake them in a preheated oven until warmed through. The pastry might not be as crisp, but they will still be delicious!
French Dip Squares
Savory crescent roll squares filled with roast beef and Swiss cheese, perfect for dipping.
Ingredients
-
2 cans refrigerated crescent rolls
-
1/2 pound deli-sliced roast beef
-
1 cup grated Swiss cheese
-
1 packet dry onion soup mix
-
1/4 cup melted butter
-
1 teaspoon Worcestershire sauce
-
1/2 teaspoon garlic powder
-
1 cup beef broth
Instructions
-
Step 1
Preheat oven to 375°F (190°C). Lightly grease a 9×13 inch baking dish. -
Step 2
Unroll crescent roll dough and press into the bottom of the prepared baking dish, sealing seams. -
Step 3
In a bowl, combine the dry onion soup mix, melted butter, Worcestershire sauce, and garlic powder. Stir well. -
Step 4
Layer the roast beef evenly over the crescent roll dough. Sprinkle the grated Swiss cheese over the roast beef. -
Step 5
Drizzle the butter mixture over the cheese and roast beef. -
Step 6
Bake for 20-25 minutes, or until golden brown and bubbly. -
Step 7
While squares are baking, warm the beef broth in a small saucepan for dipping. -
Step 8
Cut into squares and serve immediately with warm beef broth for dipping.
Important Information
Nutrition Facts (Per Serving)
It is important to consider this information as approximate and not to use it as definitive health advice.
Allergy Information
Please check ingredients for potential allergens and consult a health professional if in doubt.