Best Strawberry Pie Recipe – Sweet & Easy Dessert
Strawberry pie is more than just a dessert; it’s a sunshine-filled hug on a plate, a whisper of summer that can brighten any day. Who doesn’t adore the sweet, slightly tart burst of ripe strawberries, cradled in a flaky, golden crust? It’s a classic for a reason, evoking memories of backyard picnics and simpler times. What truly makes this strawberry pie special is its vibrant simplicity. It’s a celebration of fresh, seasonal fruit, allowing the natural sweetness of the strawberries to shine through, enhanced by just a hint of sugar and perhaps a touch of lemon zest. The beauty of a homemade strawberry pie lies not just in its exquisite taste, but in the joy of creating something so utterly delightful from scratch. Get ready to fall in love with this iconic treat all over again.
Strawberry Pie
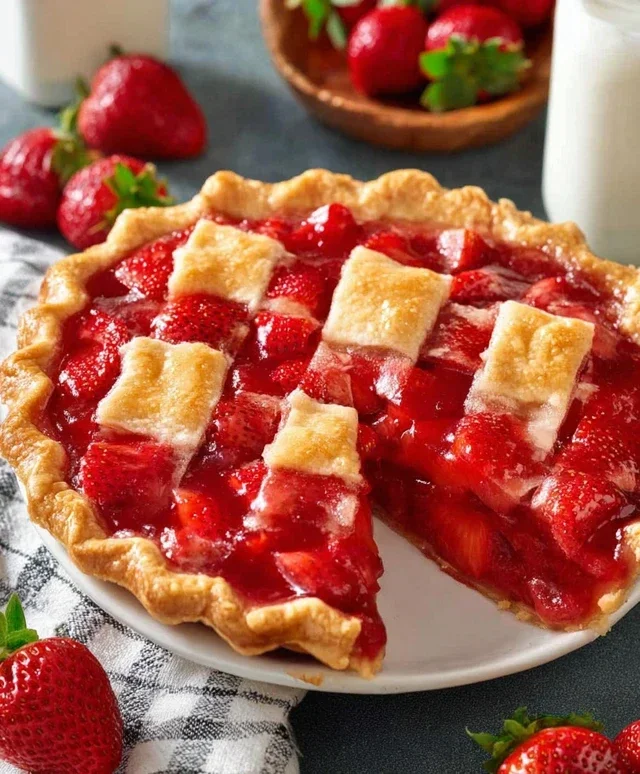
There’s something undeniably special about a classic strawberry pie. The vibrant ruby-red filling, bursting with sweet-tart strawberry flavor, nestled within a flaky, golden crust – it’s a dessert that evokes sunshine, summer picnics, and pure nostalgic joy. This recipe is a straightforward yet utterly delicious way to capture that magic, perfect for any occasion, from a casual family dinner to a festive holiday gathering. We’ll be using a combination of fresh strawberries and strawberry Jell-O to create a filling that’s both beautifully colored and wonderfully set, with that unmistakable strawberry zing. Let’s get started and create a pie that will disappear in a flash!
Ingredients:
Preparing the Pie Crust
Before we dive into the luscious filling, the first crucial step is to ensure we have a perfectly baked pie crust. For this recipe, we’re starting with a pre-baked frozen pie crust. This saves a significant amount of time and effort, allowing us to focus on the star of the show – the strawberries! When using a pre-baked crust, you want to make sure it’s fully cooled before adding your filling. You can bake it according to package directions and let it sit on a wire rack for at least 30 minutes, or even an hour, to ensure it’s completely firm and ready to hold its delicious cargo. A warm crust can cause your filling to become runny, so patience here is key. If you’re feeling ambitious and want to bake your own crust from scratch, that’s fantastic! Just be sure to blind bake it thoroughly until it’s golden brown and crisp.
Crafting the Strawberry Filling
Now for the heart of our pie! We’re going to create a glossy, flavorful strawberry filling that’s more robust than a simple fresh strawberry layer. The combination of a cooked cornstarch base with the instant set of Jell-O gives us a wonderfully stable and intensely fruity filling.
1. In a medium saucepan, whisk together the 1 cup of sugar and the 1/4 cup of cornstarch. It’s important to mix these dry ingredients together thoroughly before adding any liquid. This helps prevent lumps from forming when you add the water. You want a smooth, uniform mixture to ensure an even thickening.
2. Gradually whisk in the 1 1/2 cups of water to the sugar and cornstarch mixture. Continue whisking until all the dry ingredients are completely dissolved. This is another crucial step for achieving a smooth, lump-free filling. You’re looking for a liquid that is clear and free of any grainy texture.
3. Place the saucepan over medium heat. Cook the mixture, stirring constantly with a whisk or a heatproof spatula, until it thickens and comes to a boil. You’ll notice it will start to coat the back of your spoon. Once it reaches a rolling boil, continue to boil for 1 minute, still stirring. This boiling period is essential for activating the cornstarch’s thickening power and cooking out any raw cornstarch flavor. The mixture should become noticeably thicker and slightly translucent.
4. Remove the saucepan from the heat and immediately stir in the 1 3 oz package of strawberry Jell-O. Stir vigorously until the Jell-O is completely dissolved and the mixture is smooth and uniformly colored. The heat from the cornstarch mixture will help the Jell-O dissolve quickly. You want to ensure there are no undissolved granules of Jell-O left. This step is where the vibrant color and a good portion of the strawberry flavor will come from.
5. Gently fold in the 1 lb of sliced strawberries. Be careful not to overmix, as you want to keep the strawberry slices relatively intact for a beautiful presentation and satisfying texture in the finished pie. The goal is to evenly distribute the strawberries throughout the thickened mixture. The heat from the filling will slightly soften the strawberries and release some of their juices, infusing the entire filling with even more strawberry goodness.
Assembling and Chilling Your Pie
Once your glorious strawberry filling is ready, it’s time to assemble the pie.
Carefully pour the strawberry filling into your pre-baked and completely cooled pie crust. Spread it out evenly with a spatula, making sure to distribute the strawberry slices throughout. Try to get the filling as level as possible for a professional look.
Now comes the waiting game, but it’s a delicious anticnon-alcoholic ipation! Cover the pie loosely with plastic wrap, making sure not to touch the surface of the filling. Place the pie in the refrigerator and allow it to chill for at least 4 hours, or preferably until it’s completely set. This chilling time is essential for the Jell-O and cornstarch to fully gel and create that perfect sliceable consistency. Rushing this step will result in a runny pie, which, while still tasty, won’t have that satisfying firmness you’re looking for. You can test for doneness by gently pressing on the edge of the filling; it should feel firm and not give way easily.
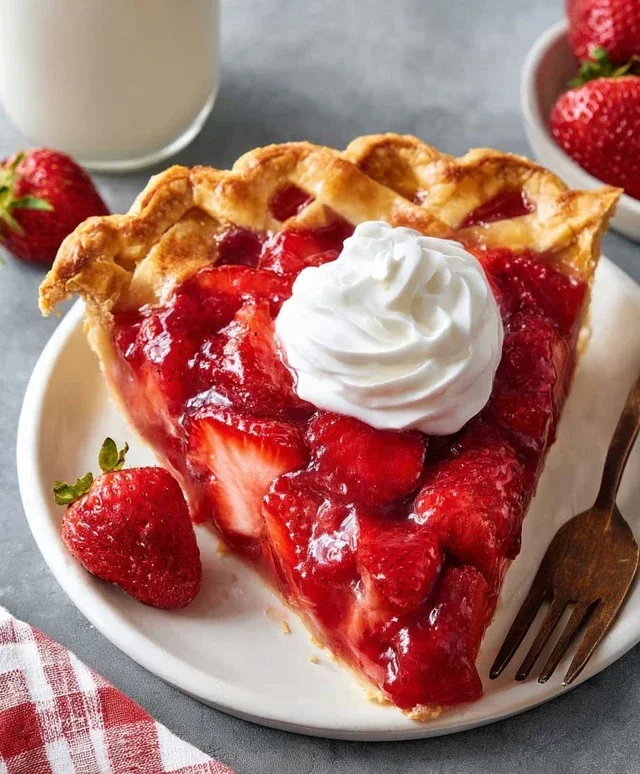
Once your strawberry pie is thoroughly chilled and set, it’s ready to be served! For an extra touch of indulgence, consider topping each slice with a dollop of whipped cream or a scoop of vanilla ice cream. Enjoy the delightful taste of summer in every single bite!
Conclusion:
And there you have it – a step-by-step guide to creating the most delightful Strawberry Pie! This recipe is truly a winner because it balances the natural sweetness of fresh strawberries with a perfectly tender crust and a hint of tartness. It’s a classic for a reason, bringin extractg vibrant flavor and a touch of summer sunshine to any occasion. Imagin extracte serving a slice of this beautiful pie to your friends and family; the vibrant red filling and glistening fruit are a feast for the eyes as much as the palate. I encourage you all to give this Strawberry Pie recipe a try. It’s incredibly rewarding to make something so delicious from scratch, and the smiles you’ll get in return are well worth the effort.
For serving, a dollop of freshly whipped cream is an absolute must, complementing the pie’s sweetness beautifully. A scoop of vanilla bean ice cream also creates a decadent pairing. Don’t be afraid to get creative with variations! You could add a sprinkle of lemon zest to the filling for an extra bright note, or even fold in a handful of blueberries for a mixed berry delight. You could also experiment with different crusts, like a grabeef ham cracker or almond flour crust, for a unique twist. This Strawberry Pie is more than just a dessert; it’s an experience!
Frequently Asked Questions:
Why is my Strawberry Pie filling watery?
Watery filling often happens if the strawberries release too much juice. To prevent this, ensure you drain excess liquid from the fresh strawberries before adding them to the pie. Also, make sure your thickener (like cornstarch or flour) is fully incorporated and cooked through to achieve the right consistency.
Can I use frozen strawberries for this recipe?
Yes, you can absolutely use frozen strawberries! However, it’s crucial to thaw them completely and drain off as much of the released liquid as possible before using them in the pie. Frozen strawberries tend to release more water than fresh ones, so thorough draining is key to avoiding a watery filling.
How long does Strawberry Pie last?
Once baked and cooled, a Strawberry Pie can be stored at room temperature for up to two days, provided your kitchen isn’t too warm. For longer storage, it’s best to refrigerate it, where it will keep well for about 3-4 days. Make sure to cover it loosely to prevent the crust from becoming soggy.
Strawberry Pie
A classic and refreshing strawberry pie with a creamy filling and a crisp crust.
Ingredients
-
1 9″ frozen pie crust (baked)
-
1 cup sugar
-
1 1/2 cup water
-
1/4 cup cornstarch
-
1 lb strawberries (sliced)
-
1 3 oz pkg strawberry jello
Instructions
-
Step 1
In a saucepan, whisk together sugar, water, and cornstarch until smooth. -
Step 2
Cook over medium heat, stirring constantly, until the mixture thickens and boils. Boil for 1 minute. -
Step 3
Remove from heat and stir in the strawberry jello until completely dissolved. -
Step 4
Gently fold in the sliced strawberries. -
Step 5
Pour the strawberry mixture into the pre-baked pie crust. -
Step 6
Chill for at least 4 hours, or until firm. Serve cold.
Important Information
Nutrition Facts (Per Serving)
It is important to consider this information as approximate and not to use it as definitive health advice.
Allergy Information
Please check ingredients for potential allergens and consult a health professional if in doubt.