Easy Homemade Strawberry Ice Cream – Simply Delicious
Homemade strawberry ice cream is a culinary dream, a vibrant swirl of pure, unadulterated summer joy captured in a creamy, frozen delight. There’s something undeniably magical about biting into a scoop of this classic treat, isn’t there? It’s more than just a dessert; it’s a nostalgic journey back to sun-drenched afternoons and carefree days, where the sweet, slightly tart flavor of ripe strawberries was the undisputed king of flavors. What makes our homemade strawberry ice cream so special is the incredible simplicity and the promise of unparalleled freshness. Forget the artificial colors and muted flavors of store-bought varieties; this recipe lets the true essence of fresh strawberries shine through, creating a taste that is both intensely fruity and luxuriously smooth. Imagin extracte the satisfaction of churning your own batch, knowing that every spoonful is a testament to your kitchen prowess. This isn’t just ice cream; it’s an experience waiting to be savored.
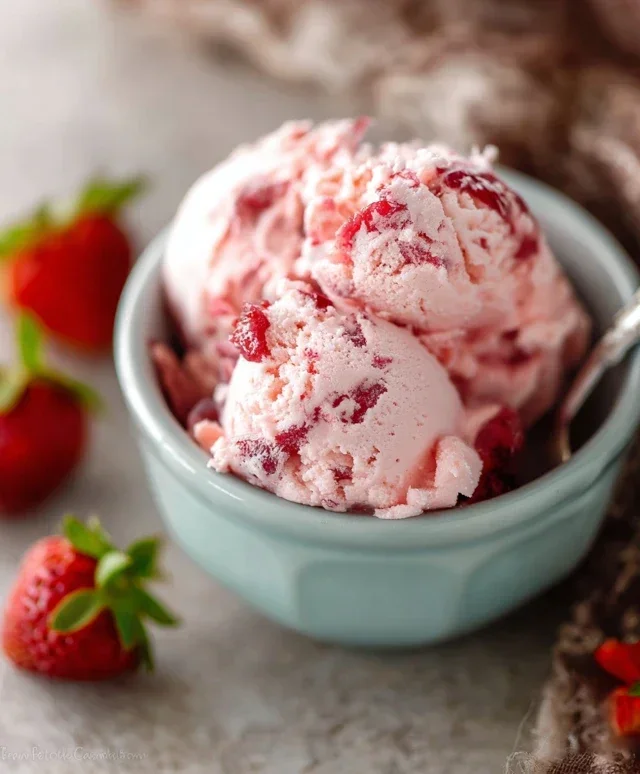
Homemade Strawberry Ice Cream
There’s something undeniably magical about homemade strawberry ice cream. The vibrant pink hue, the sweet burst of fresh berry flavor, and that incredibly creamy texture that store-bought versions often struggle to replicate – it’s a taste of pure summer joy. Forget the complicated machines and lengthy churning processes; this recipe is designed to be accessible, even for begin extractners, and results in a truly spectacular frozen treat. We’ll be harnessing the natural sweetness and vibrant color of fresh strawberries, enhanced by just a touch of honey and lemon to really make those flavors sing. Get ready to impress yourself and anyone lucky enough to share a scoop (or three!) of this delightful homemade ice cream.
Ingredients:
Preparing the Strawberry Base
The foundation of our incredible strawberry ice cream lies in a perfectly prepared strawberry base. This is where we extract maximum flavor and achieve that gorgeous, natural color.
1. First, take your hulled and diced strawberries. Place them in a small bowl. Add the 2 tablespoons of honey and the 1 teaspoon of lemon juice. The honey adds a lovely floral sweetness that complements the strawberries beautifully, while the lemon juice is a secret weapon for brightening their flavor and cutting through any potential cloying sweetness. Gently stir everything together to coat the strawberries evenly.
2. Allow this mixture to sit for at least 15-20 minutes at room temperature. This maceration process is key! As the strawberries sit with the honey and lemon, they’ll begin extract to release their juices. This not only concentrates their flavor but also creates a delicious syrup. You’ll see the strawberries soften slightly and the liquid at the bottom of the bowl will become a beautiful, ruby-red hue. Once macerated, I like to gently mash some of the strawberries with a fork. This helps to break them down further and distribute their pulp and juice throughout the mixture, ensuring a consistent strawberry flavor in every bite of ice cream. Don’t mash them into a complete puree; leaving some small chunks adds a wonderful textural element.
Crafting the Creamy Ice Cream Mixture
Now that our strawberries are ready to impart their flavor, it’s time to create the rich, creamy base that will hold all that deliciousness.
3. In a separate medium bowl, combine the 1 cup of heavy whipping cream, the 1/2 cup of half and half, and the 1/2 cup of granulated sugar. Whisk these ingredients together until the sugar is mostly dissolved. You don’t need to whip the cream to stiff peaks at this stage; we’re just aiming for a smooth, well-combined mixture. The combination of heavy cream and half and half provides the perfect balance of richness and a slightly lighter consistency, preventing the ice cream from becoming too heavy or icy.
4. Now, gently fold the prepared strawberry mixture (including all those lovely juices) into the cream mixture. Add the 1 teaspoon of vanilla extract. Vanilla is a classic ice cream flavor enhancer, and it plays wonderfully with strawberries, deepening their sweetness and adding a subtle aromatic layer. Stir gently until everything is just combined. Be careful not to overmix, as we want to maintain the airy texture of the cream. At this point, you can taste the mixture and adjust sweetness if you prefer. Remember that freezing slightly dulls sweetness, so it’s okay if it tastes a touch sweeter than you might prefer in its liquid state.
Chilling and Freezing for Perfection
This is the crucial stage where our liquid mixture transforms into luscious ice cream. Patience is key here!
5. Once your strawberry and cream mixture is ready, cover the bowl tightly with plastic wrap and refrigerate it for at least 4 hours, or preferably overnight. This chilling period is absolutely essential. It allows the flavors to meld together beautifully and ensures the base is thoroughly cold. A very cold base will freeze more efficiently and result in a smoother, creamier ice cream with smaller ice crystals. While many recipes involve an ice cream maker, this particular recipe is designed for a no-churn method, making it even more accessible. Pour the chilled mixture into a freezer-safe container, like a loaf pan or a metal container. Cover it tightly, either with a lid or by pressing plastic wrap directly onto the surface of the ice cream to prevent ice crystals from forming.
6. Place the container in the freezer. Every 30-45 minutes for the first 2-3 hours, remove the container and stir the ice cream vigorously with a fork or a whisk. This process breaks up the ice crystals as they form, which is the secret to achieving that wonderfully smooth, creamy texture without an ice cream maker. Scrape down the sides and bottom of the container to ensure all parts of the mixture are getting churned. After the initial few hours of stirring, allow the ice cream to freeze completely, which will take another 2-4 hours, or until it reaches your desired firmness.
When it’s finally ready, scoop generously and enjoy the fruits (literally!) of your labor. This homemade strawberry ice cream is a testament to how simple, fresh ingredients can create something truly extraordinary.
Conclusion:
There you have it – your guide to crafting the most incredibly delicious homemade strawberry ice cream! This recipe truly shines because it allows the vibrant, natural flavor of fresh strawberries to take center stage, without any artificial interference. The creamy texture achieved is simply divine, making every spoonful a delightful experience. It’s far more rewarding and often tastier than anything you can buy pre-made. Imagin extracte the joy of sharing this homemade goodness with loved ones, or simply indulgin extractg in a personal treat after a long day.
For serving, this strawberry delight is perfect on its own, but also shines when paired with a warm brownie, a slice of angel food cake, or topped with fresh berries and a sprig of mint. Don’t be afraid to get creative! You can easily adapt this recipe by adding a swirl of balsamic glaze for a sophisticated twist, or folding in some chocolate chips for a delightful textural contrast. I highly encourage you to give this recipe a try; I’m confident you’ll fall in love with the ease and the incredible results.
Frequently Asked Questions about Homemade Strawberry Ice Cream:
Q: What kind of strawberries are best for this recipe?
A: Ripe, in-season strawberries will provide the most intense and authentic strawberry flavor. Freshly picked berries are ideal, but good quality frozen strawberries can also be used if fresh are unavailable. Just ensure they are fully thawed and drained before pureeing.
Q: Can I make this ice cream without an ice cream maker?
A: Absolutely! While an ice cream maker yields the smoothest texture, you can achieve a delicious result by freezing the mixture in a shallow container and stirring vigorously every 30-45 minutes for the first 2-3 hours until it reaches your desired consistency. This manual churning helps break up ice crystals.
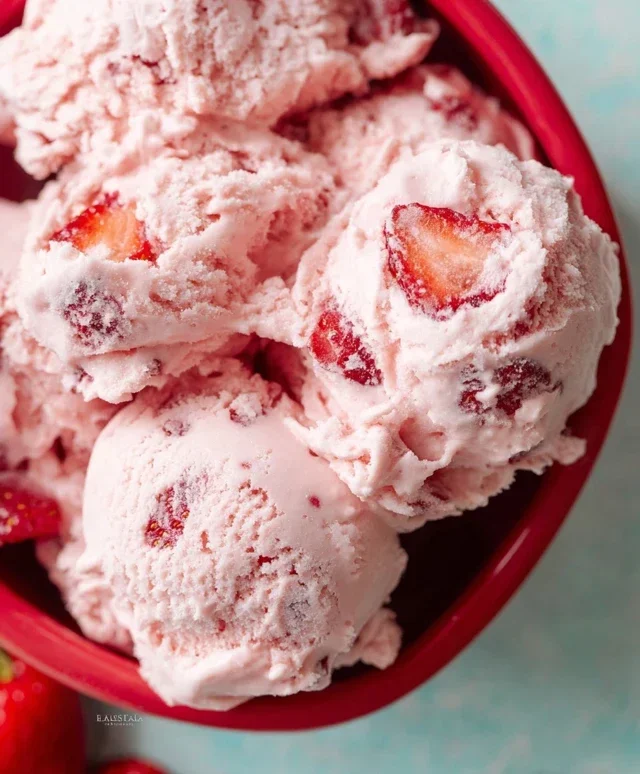
Homemade Strawberry Ice Cream
Creamy and delicious homemade strawberry ice cream, perfect for a sweet treat. Made with fresh strawberries, this recipe is surprisingly easy to make.
Ingredients
-
1 1/2 cups strawberries, hulled and diced
-
2 Tbsp honey
-
1/2 cup granulated sugar
-
1 tsp lemon juice
-
1 cup heavy whipping cream
-
1/2 cup half and half
-
1 tsp vanilla extract
Instructions
-
Step 1
In a bowl, combine the hulled and diced strawberries, honey, granulated sugar, and lemon juice. Mash the strawberries slightly with a fork, then let the mixture sit for 15-20 minutes to allow the strawberries to macerate. -
Step 2
While the strawberries are macerating, in a separate bowl, whisk together the heavy whipping cream, half and half, and vanilla extract until well combined. -
Step 3
Once the strawberries have macerated, gently fold the strawberry mixture into the cream mixture. -
Step 4
Pour the mixture into your ice cream maker and churn according to the manufacturer’s instructions. -
Step 5
Once churned, transfer the ice cream to an airtight container and freeze for at least 2-4 hours, or until firm.
Important Information
Nutrition Facts (Per Serving)
It is important to consider this information as approximate and not to use it as definitive health advice.
Allergy Information
Please check ingredients for potential allergens and consult a health professional if in doubt.