Cookies & Cream Red Velvet Bites – Delicious Recipe
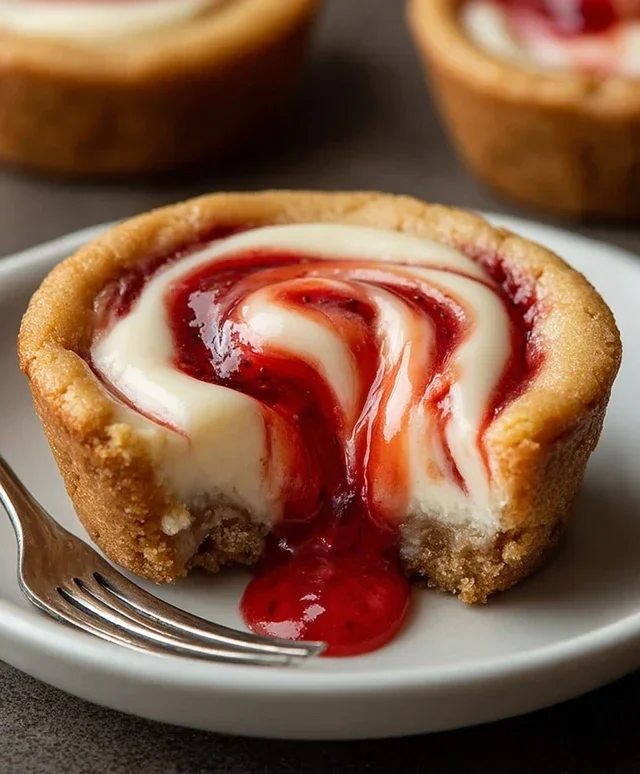
Cookies & Cream Red Velvet Bites are an absolute dream come true for anyone who adores the rich, decadent flavors of both classics. We’ve taken the beloved crimson hue and subtle cocoa notes of red velvet cake and married them with the irresistible crunch and creamy sweetness of cookies and cream. Imagin extracte miniature bursts of pure joy, where a tender, slightly tangy red velvet cake is studded with generous chunks of chocolate sandwich cookies, all enrobed in a luscious, sweet cream frosting. It’s no wonder these treats are so universally adored; they tap into pure comfort and indulgence.
What makes our Cookies & Cream Red Velvet Bites truly special is the perfect harmony of textures and tastes. The moist, vibrant red velvet base provides a delightful chew, while the cookies offer that satisfying snap. And that creamy frosting? It’s the unifying element, bringin extractg everything together in a symphony of deliciousness. These are more than just desserts; they are little edible moments of happiness, perfect for celebrations, a sweet afternoon pick-me-up, or simply when you need a little bit of magic in your day. Get ready to fall in love with these bite-sized wonders!

Cookies & Cream Red Velvet Bites
Get ready to fall in love with these incredibly delicious Cookies & Cream Red Velvet Bites! They’re the perfect little bursts of flavor and texture, combining the rich, decadent taste of red velvet with the delightful crunch of cookies and the creamy sweetness of cream cheese frosting. These bites are surprisingly easy to make, making them a fantastic option for parties, bake snon-alcoholic ales, or simply as a special treat for yourself. We’re going to break down exactly how to achieve this delightful combination.
Ingredients:
Let’s Get Baking!
Now that we have all our ingredients gathered, let’s dive into the fun part – creating these amazing bites!
Enjoy these delightful Cookies & Cream Red Velvet Bites! They’re perfect for any occasion and are sure to be a crowd-pleaser. The vibrant color, rich flavor, and satisfying textures make them an irresistible treat.

Conclusion:
I hope you’ve had as much fun reading about these Cookies & Cream Red Velvet Bites as I’ve had creating and devouring them! These little gems are an absolute triumph, perfectly balancing the rich, slightly tangy flavor of red velvet with the satisfying crunch and creamy sweetness of cookies and cream. They are incredibly versatile, making them ideal for any occasion, from a simple afternoon treat to a show-stopping dessert at a party. The intense red color also makes them visually stunning, a guaranteed crowd-pleaser.
When it comes to serving, these bites are fantastic on their own, but they also elevate any dessert platter. Imagin extracte them nestled alongside a classic cheesecake, or even crum extractbled over a scoop of vanilla ice cream. For a fun twist, consider adding a drizzle of white chocolate ganache or a sprinkle of extra cookie crum extractbs on top. If you’re feeling adventurous with variations, try incorporating white chocolate chips directly into the red velvet batter, or even using a different type of cookie, like white chocolate macadamia, for a unique flavor profile. I truly encourage you to give this Cookies & Cream Red Velvet Bites recipe a try; you won’t regret it!
Frequently Asked Questions:
Can I make these ahead of time?
Absolutely! These Cookies & Cream Red Velvet Bites can be made a day or two in advance and stored in an airtight container at room temperature. This makes them perfect for busy schedules or for preparing for events well in advance.
What kind of cookies work best for the “cookies and cream” element?
Standard chocolate sandwich cookies (like Oreos) are the classic choice and work wonderfully. However, you could also experiment with crème-filled cookies in other flavors, like mint or golden Oreos, for different taste experiences.
Can I freeze these bites?
Yes, freezing is a great option for longer storage. Once completely cooled, you can freeze the bites in a single layer on a baking sheet until firm, then transfer them to a freezer-safe bag or container. Thaw them at room temperature before enjoying.
Cookies & Cream Red Velvet Bites
Decadent red velvet cookies studded with crushed chocolate sandwich cookies and topped with a creamy vanilla frosting.
Ingredients
-
1½ cups all-purpose flour
-
1 cup granulated sugar
-
2 tablespoons cocoa powder
-
½ teaspoon baking soda
-
½ teaspoon salt
-
½ cup buttermilk
-
½ cup vegetable oil
-
2 eggs
-
1 teaspoon vanilla extract
-
1 teaspoon vinegar
-
1 tablespoon red food coloring
-
4 oz cream cheese, softened
-
¼ cup butter, softened
-
1½ cups powdered sugar
-
1 teaspoon vanilla extract
Instructions
-
Step 1
Preheat oven to 350°F (175°C). Line baking sheets with parchment paper. -
Step 2
In a large bowl, whisk together flour, granulated sugar, cocoa powder, baking soda, and salt. -
Step 3
In a separate bowl, whisk together buttermilk, vegetable oil, eggs, 1 teaspoon vanilla extract, vinegar, and red food coloring. -
Step 4
Add the wet ingredients to the dry ingredients and mix until just combined. Fold in crushed chocolate sandwich cookies (reserve some for garnish). -
Step 5
Drop rounded tablespoons of dough onto the prepared baking sheets. -
Step 6
Bake for 10-12 minutes, or until edges are set and centers are slightly soft. -
Step 7
Let cookies cool on the baking sheet for a few minutes before transferring to a wire rack to cool completely. -
Step 8
For the frosting, beat together softened cream cheese and softened butter until smooth. -
Step 9
Gradually add powdered sugar and 1 teaspoon vanilla extract, beating until light and fluffy. -
Step 10
Frost the cooled cookies and garnish with reserved crushed chocolate sandwich cookies.
Important Information
Nutrition Facts (Per Serving)
It is important to consider this information as approximate and not to use it as definitive health advice.
Allergy Information
Please check ingredients for potential allergens and consult a health professional if in doubt.