Creamy Garlic Chicken Ramen-Ultimate Recipe
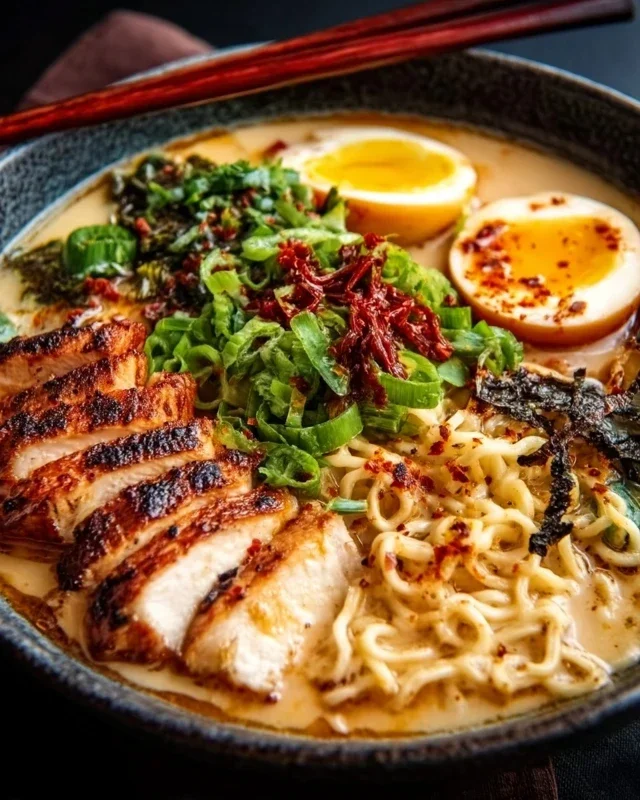
Creamy Garlic Chicken Ramen: An Incredible Ultimate Recipe is about to revolutionize your weeknight dinners! Forget everything you thought you knew about instant ramen because this dish takes humble noodles to an entirely new level of deliciousness. We’re talking about a bowl so rich, so satisfying, and so utterly comforting, it’s practically a hug in a bowl. The magic lies in the velvety smooth, intensely flavorful broth, infused with fragrant garlic and tender, succulent chicken. It’s that perfect marriage of savory depth and creamy indulgence that has everyone raving. This Creamy Garlic Chicken Ramen: An Incredible Ultimate Recipe isn’t just a meal; it’s an experience. Prepare to be amazed as you slurp up every last drop of this incredible creation!
Creamy Garlic Chicken Ramen: An Incredible Ultimate Recipe
Welcome to your new favorite weeknight meal! If you’re craving something deeply satisfying, incredibly flavorful, and surprisingly easy to whip up, you’ve landed in the right place. This Creamy Garlic Chicken Ramen is more than just a bowl of noodles; it’s a comforting embrace in culinary form, perfect for those chilly evenings or when you just need a little extra indulgence. Forget those bland, instant ramen packets; we’re elevating it to a whole new level with rich, creamy broth, tender chicken, and a punch of garlic that will make your taste buds sing. This recipe is designed to be straightforward, allowing you to create a restaurant-quality ramen experience right in your own kitchen. Let’s get cooking!
Ingredients:
Cooking Instructions
Step 1: Prepare the Chicken
Begin extract by patting your chicken breasts dry with paper towels. This helps create a better sear. Season them generously on both sides with salt and pepper. Heat the olive oil in a large pot or Dutch oven over medium-high heat. Once the oil is shimmering, carefully place the seasoned chicken breasts in the pot. Sear them for about 5-7 minutes per side, until they are golden brown and cooked through. The internal temperature should reach 165°F (74°C). Don’t worry if they aren’t fully cooked inside at this stage, as they will continue to cook in the broth. Once seared, remove the chicken from the pot and set it aside on a cutting board. Let it rest for at least 5-10 minutes before slicing or shredding. Resting the chicken is crucial for keeping it juicy and tender.
Step 2: Build the Flavor Base
In the same pot, reduce the heat to medium. Add the minced garlic and grated gin extractger to the pot. Sauté them for about 1-2 minutes, stirring constantly, until fragrant. Be careful not to burn the garlic, as this can make it bitter. If you’re using red pepper flakes, you can add them now as well to infuse their warmth into the oil. Next, pour in the chicken broth and water. Bring the mixture to a simmer, scraping up any browned bits from the bottom of the pot – these bits are packed with flavor! Stir in the soy sauce. Let this broth base simmer gently for about 5 minutes to allow the flavors to meld together.
Step 3: Create the Creamy Broth and Cook Noodles
Now it’s time to make our ramen broth truly spectacular. Pour in the heavy cream and stir to combine it with the broth. Bring the mixture back to a gentle simmer, but avoid boiling vigorously, as cream can sometimes curdle if overheated. While the broth is gently heating, cook your ramen noodles according to the package directions, but undercook them by about 1 minute, as they will finish cooking in the hot broth. Drain the noodles thoroughly and set them aside.
Step 4: Thicken the Broth and Add Vegetables
In a small bowl, whisk together the cornstarch and 2 tablespoons of water until smooth, creating a slurry. This is our thickening agent. Gradually whisk the cornstarch slurry into the simmering broth. Continue to stir gently until the broth thickens to your desired consistency. This usually takes about 1-2 minutes. If you are adding vegetables like spinach or bok choy, now is the perfect time to add them. They will wilt and cook in the hot broth in just a couple of minutes. If you’re using heartier vegetables like sliced bell peppers, you might want to add them a few minutes earlier to ensure they are tender.
Step 5: Assemble and Serve Your Ramen Masterpiece
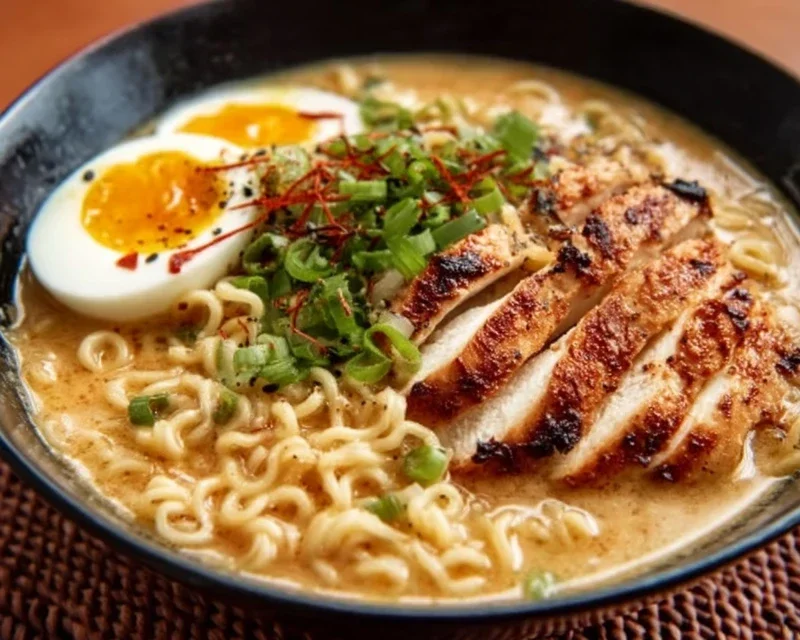
Once the broth has thickened and any vegetables are cooked, it’s time to assemble your ramen bowls. Divide the drained ramen noodles among your serving bowls. Slice or shred the rested chicken breasts and arrange them on top of the noodles. Ladle the hot, creamy garlic broth generously over the chicken and noodles. Garnish with sliced green onions and fresh cilantro, if using. Give it a final taste and adjust salt and pepper if needed. Serve immediately and savor every delicious, creamy spoonful! This is truly an incredible, ultimate ramen experience.
Conclusion:
So there you have it – an incredibly delicious and surprisingly simple Creamy Garlic Chicken Ramen recipe that’s guaranteed to become a new favorite! We’ve combined tender, succulent chicken with a rich, velvety garlic broth and perfectly cooked ramen noodles for a meal that’s both comforting and satisfying. This recipe truly elevates the humble ramen to an ultimate dining experience, perfect for a weeknight treat or a special occasion. Feel free to serve it as is, or get creative! It pairs beautifully with a side of steamed edamame or a crisp Asian-inspired slaw. For variations, consider adding sautéed mushrooms, a swirl of chili oil for a spicy kick, or even some bok choy for extra greens. I really encourage you to give this Creamy Garlic Chicken Ramen a try; you won’t be disappointed!
Frequently Asked Questions:
Can I make this recipe ahead of time?
While the broth and cooked chicken can be made ahead and stored in the refrigerator, it’s best to cook the ramen noodles just before serving to prevent them from becoming mushy. You can reheat the broth and chicken mixture gently on the stovetop before assembling your bowls.
What kind of chicken is best for this ramen?
Boneless, skinless chicken thighs are highly recommended for their tenderness and ability to absorb flavor. However, chicken breast will also work well if you prefer a leaner option. Just be careful not to overcook it.
Is it possible to make this recipe dairy-free?
Yes, you can adapt this recipe for a dairy-free diet. Instead of heavy cream, try using full-fat coconut milk or a plant-based creamer. The flavor profile might change slightly, but it will still be delicious!
Creamy Garlic Chicken Ramen: An Incredible Ultimate Recipe
A rich and flavorful creamy garlic chicken ramen, elevated with fresh ingredients and a touch of spice. This ultimate recipe delivers comfort in a bowl.
Ingredients
-
2 boneless, skinless chicken breasts
-
4 cups chicken broth
-
2 cups water
-
3 packs of ramen noodles (discard the seasoning packets)
-
1 cup heavy cream
-
4 cloves garlic, minced
-
1 tablespoon olive oil
-
1 tablespoon soy sauce
-
1 tablespoon cornstarch (mixed with 2 tablespoons water)
-
1 teaspoon ginger, grated
-
1 teaspoon red pepper flakes (optional)
-
Salt and pepper to taste
-
2 green onions, sliced (for garnish)
-
Fresh cilantro (for garnish, optional)
-
Vegetables of your choice (e.g., spinach, bok choy, bell peppers)
Instructions
-
Step 1
Slice chicken breasts into bite-sized pieces. Season with salt and pepper. -
Step 2
Heat olive oil in a large pot or Dutch oven over medium-high heat. Add chicken and cook until browned on all sides and cooked through. Remove chicken from the pot and set aside. -
Step 3
Add minced garlic and grated ginger to the same pot. Sauté for about 1 minute until fragrant. -
Step 4
Pour in chicken broth and water. Bring to a simmer. Stir in soy sauce and red pepper flakes (if using). -
Step 5
Add ramen noodles to the simmering broth and cook according to package directions, usually 3-5 minutes. In the last minute of cooking, stir in the cornstarch slurry and cook until the broth thickens. -
Step 6
Stir in the heavy cream and return the cooked chicken to the pot. Heat through, but do not boil. -
Step 7
Add your chosen vegetables and cook until tender-crisp. -
Step 8
Taste and adjust seasoning with salt and pepper as needed. -
Step 9
Serve hot, garnished with sliced green onions and fresh cilantro, if desired.
Important Information
Nutrition Facts (Per Serving)
It is important to consider this information as approximate and not to use it as definitive health advice.
Allergy Information
Please check ingredients for potential allergens and consult a health professional if in doubt.