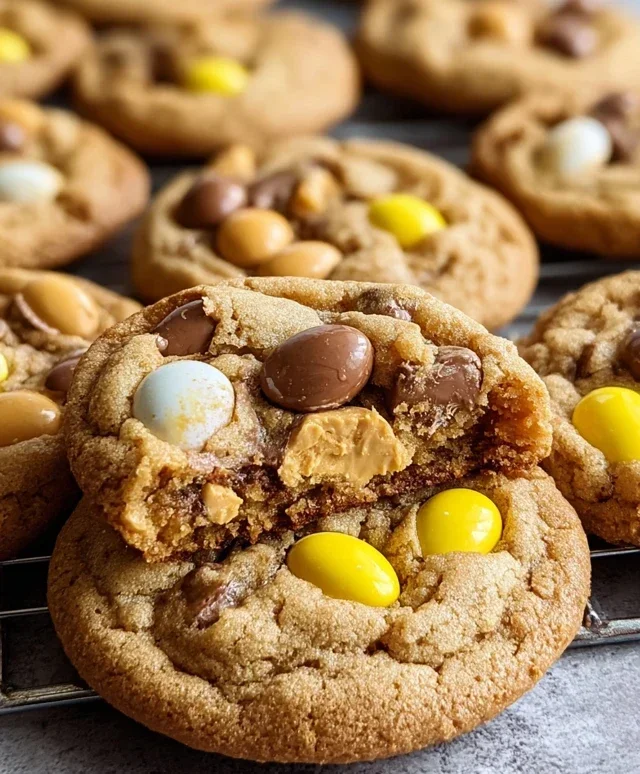
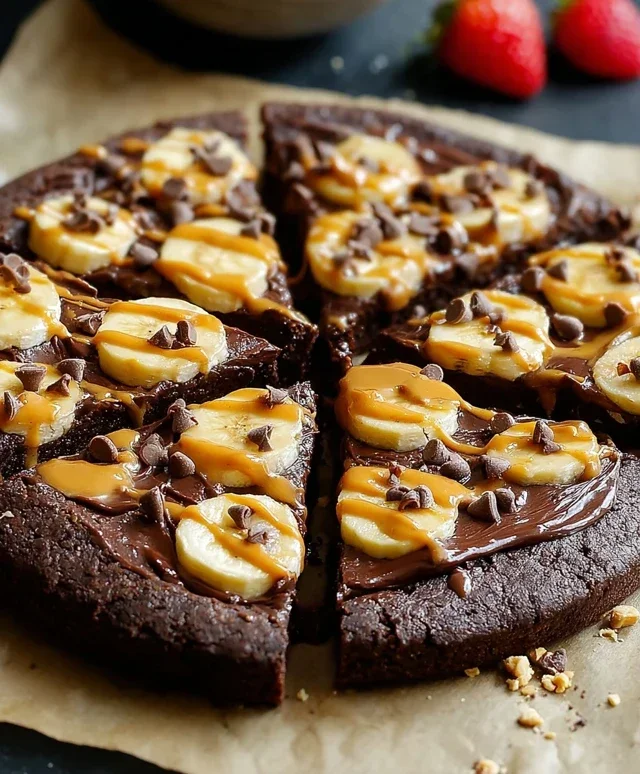
Decadent Chocolate Peanut Butter Pizza Recipe
Chocolate Peanut Butter Pizza. Just the mention of those words conjures up a symphony of sweet and salty perfection, doesn’t it? It’s a dessert that defies expectations, a glorious mashup of two universally beloved flavor profiles that somehow, magically, become even greater than the sum of their parts. Why do we adore this creation so much? It’s the ultimate indulgence, a comforting blend of creamy peanut butter and rich, decadent chocolate, all nestled on a delightful, often cookie-like, crust. What truly makes this Chocolate Peanut Butter Pizza special is its playful spirit. It’s not just a dessert; it’s an experience. It’s the kind of treat that inspires smiles, sparks conversations, and turns any ordinary evening into a mini celebration. Get ready to fall head over heels for this irresistible combination.
Ready to create your own?
Dive into our incredible Chocolate Peanut Butter Pizza recipe below!
Chocolate Peanut Butter Pizza
Prepare yourselves for a dessert that will redefine your definition of indulgence. This Chocolate Peanut Butter Pizza is not just a treat; it’s an experience. Imagin extracte a warm, chewy cookie crust as your foundation, generously slathered with creamy peanut butter, and then piled high with a decadent symphony of chocolate and peanut butter candies. It’s a crowd-pleaser, a weeknight pick-me-up, and a guaranteed way to win over anyone with a sweet tooth. Forget your traditional pizza toppings; we’re going straight for the good stuff. This recipe is surprisingly simple, relying on a few key store-bought ingredients that come together to create something truly magical. So, let’s get started and whip up this masterpiece.
Ingredients:
Preparing the Crust
The foundation of our delicious dessert is a simple yet effective cookie crust. We’re starting with a tube of refrigerated chocolate chip cookie dough. This is a fantastic shortcut that ensures a consistently delicious and easy-to-work-with dough. You’ll want to preheat your oven to the temperature recommended on the cookie dough package, which is usually around 350°F (175°C). Grease a 12-inch pizza pan or a large baking sheet. I prefer using a pizza pan because it gives us those nice, slightly raised edges that help contain all the delicious toppings.
Now, it’s time to shape our dough. Open the roll of cookie dough and unwrap it. You can either gently press the dough into the pan directly, or if you find it a little sticky, you can lightly flour your hands. Spread the dough evenly across the bottom of the pan, pressing it outwards to create a circular pizza shape. Aim for a thickness that isn’t too thin (which could burn) or too thick (which might not cook through properly). About ¼-inch thickness is usually perfect. Once your dough is shaped, it’s ready for its initial bake.
The First Bake and Peanut Butter Layer
Place the prepared cookie dough base into the preheated oven. You’ll want to bake it until it’s lightly golden brown around the edges and mostly set in the center. This usually takes about 10-15 minutes, depending on your oven. Keep a close eye on it; we don’t want to overbake it at this stage as it will continue to bake with the toppings. Once it’s done, carefully remove it from the oven.
Now comes the fun part – the peanut butter layer! While the cookie crust is still warm, spread the creamy peanut butter evenly over the entire surface, right up to the edges. The warmth of the crust will help the peanut butter become wonderfully spreadable and meld beautifully with the cookie dough. Make sure to get a nice, even layer. Don’t be shy with it; this is a peanut butter lover’s dream!
Adding the Chocolatey Goodness
With our warm peanut butter layer in place, it’s time to load up on the chocolate! Sprinkle the semi-sweet chocolate morsels evenly over the peanut butter. The residual heat from the crust and peanut butter will start to melt these morsels, creating a gooey, chocolatey base for our other toppings. Don’t worry if they don’t melt completely just yet; they’ll continue to soften as the pizza bakes.
Next, scatter the chopped bite-size chocolate peanut butter cups over the chocolate morsels. These add an extra punch of both chocolate and peanut butter flavor and create delightful pockets of creamy, melted goodness. Then, add the miniature candy-coated chocolate pieces. These will add a satisfying crunch and a pop of color. Finally, sprinkle the chopped salted peanuts over everything. The saltiness of the peanuts is a crucial element that balances the sweetness of the chocolate and peanut butter, adding a complex flavor profile to the pizza.
The Final Bake and Finishing Touches
Now, return the pizza to the oven for its final bake. This bake is primarily to melt the chocolate morsels and soften the candies, bringin extractg everything together into a cohesive, delicious dessert. Bake for another 5-8 minutes, or until the chocolate morsels are mostly melted and the toppings look irresistible. Again, keep a close watch to prevent burning.
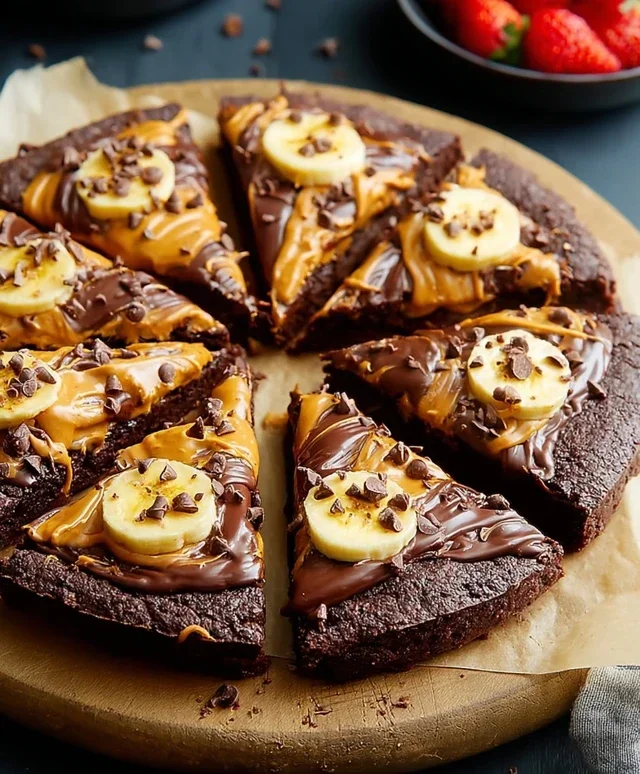
Once the pizza is out of the oven, and while it’s still warm and the chocolate is melty, you can add an optional but highly recommended drizzle of chocolate sauce. This adds an extra layer of visual appeal and even more chocolatey decadence. Let the pizza cool for a few minutes before slicing and serving. This allows the toppings to set slightly, making it easier to cut and enjoy without all the goodies sliding off. Serve warm and watch it disappear! This Chocolate Peanut Butter Pizza is best enjoyed fresh, but leftovers can be stored at room temperature for a day or two, though the crust may soften.
Conclusion:
There you have it – the ultimate guide to creating a show-stopping Chocolate Peanut Butter Pizza! This recipe is an absolute winner because it perfectly blends the irresistible flavors of rich chocolate and creamy peanut butter in a fun, shareable format. It’s surprisingly easy to make and guaranteed to impress everyone from seasoned dessert connoisseurs to picky eaters. Whether you’re looking for a unique dessert for a party, a fun family activity, or just a decadent treat for yourself, this Chocolate Peanut Butter Pizza is your answer.
For serving, I love cutting it into generous slices and enjoying it slightly warm, allowing the peanut butter to become even more gooey and luscious. It’s also fantastic chilled, providing a firmer texture that’s still utterly delicious. Feel free to get creative with variations! You could sprinkle on some chopped roasted peanuts for extra crunch, add a drizzle of caramel sauce, or even incorporate some mini chocolate chips into the peanut butter layer. Don’t be afraid to experiment and make it your own!
I wholeheartedly encourage you to give this Chocolate Peanut Butter Pizza recipe a try. It’s a dessert experience that’s truly out of this world and bound to become a favorite. Let me know how yours turns out!
Frequently Asked Questions:
Can I make this pizza ahead of time?
Absolutely! You can prepare the pizza base and the chocolate layer a day in advance and store them separately in the refrigerator. Add the peanut butter topping and any other garnishes just before serving for the best texture and flavor.
What kind of crust works best for this dessert pizza?
A classic pizza dough works wonderfully, providing a slightly chewy base. For a quicker option, you could also use a pre-made cookie dough or even a large, round brownie as your base. The key is to have something sturdy enough to hold the toppings.
Is it possible to make this recipe dairy-free or vegan?
Yes, it’s definitely possible! You can use a dairy-free pizza dough or cookie dough base. For the chocolate layer, opt for dark chocolate chips that are certified vegan. And of course, ensure your peanut butter is just peanuts and salt. Many plant-based peanut butters are readily available.
Chocolate Peanut Butter Pizza
A decadent dessert pizza combining chocolate chip cookie dough, creamy peanut butter, and a medley of chocolate and peanut butter candies.
Ingredients
-
1 (18-oz) roll refrigerated chocolate chip cookie dough
-
3/4 cup creamy peanut butter
-
1 cup semi-sweet chocolate morsels
-
1/2 cup bite-size chocolate peanut butter cups, chopped
-
1/4 cup miniature candy-coated chocolate pieces
-
1/4 cup salted peanuts, chopped
-
Chocolate sauce for drizzling (optional)
Instructions
-
Step 1
Preheat oven to 350 degrees F (175 degrees C). Lightly grease a pizza pan or baking sheet. -
Step 2
Press the refrigerated chocolate chip cookie dough evenly onto the prepared pizza pan to form a crust. -
Step 3
Bake the cookie dough crust for 10-12 minutes, or until lightly golden brown around the edges. Let cool slightly. -
Step 4
Spread the creamy peanut butter evenly over the cooled cookie dough crust. -
Step 5
Sprinkle the semi-sweet chocolate morsels over the peanut butter layer. -
Step 6
Top with the chopped bite-size chocolate peanut butter cups and miniature candy-coated chocolate pieces. -
Step 7
Scatter the chopped salted peanuts over the toppings. -
Step 8
Drizzle with chocolate sauce, if desired. Slice and serve warm or at room temperature.
Important Information
Nutrition Facts (Per Serving)
It is important to consider this information as approximate and not to use it as definitive health advice.
Allergy Information
Please check ingredients for potential allergens and consult a health professional if in doubt.