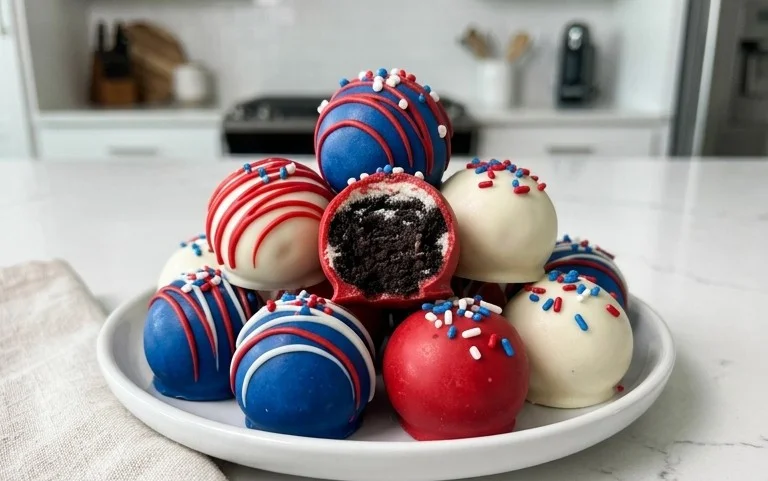
Easy No Bake Patriotic Cheesecake Recipe
No Bake Patriotic Cheesecake is the star of any summer celebration, and for good reason! This vibrant dessert is not only a feast for the eyes with its stunning red, white, and blue layers, but it’s also incredibly easy to make. Forget the oven and the stress; this no bake wonder is perfect for those hot days when you want something decadent without the extra heat. It’s the ultimate crowd-pleaser, bringin extractg smiles to faces with its creamy texture and refreshing taste.
What truly makes our No Bake Patriotic Cheesecake so special is its effortless elegance. It’s the perfect way to show your patriotic spirit for holidays like the Fourth of July, Memorial Day, or any occasion that calls for a touch of American flair. The combination of a simple, no-bake grabeef ham cracker crust, a luscious creamy filling, and those iconic fruit layers is simply irresistible. Prepare to be amazed at how such a simple recipe can deliver such a show-stopping result. Let’s dive in and create some delicious memories!
No Bake Patriotic Cheesecake
Looking for a show-stopping dessert that screams patriotism without the fuss of baking? My No Bake Patriotic Cheesecake is the answer! It’s incredibly easy to make, requires no oven time, and the vibrant layers of red, white, and blue are guaranteed to impress at any summer gathering, Fourth of July celebration, or just because you want a delicious treat. This recipe is all about simple steps leading to a wonderfully creamy and flavorful cheesecake experience. The golden Oreo crust adds a delightful buttery crunch, while the creamy filling is perfectly sweet. And the Jell-O layers? They’re the fun, flavorful, and colorful stars of the show! Let’s get started on creating this edible masterpiece.
Ingredients:
Instructions:
Step 1: Prepare the Golden Oreo Crust
First, we’ll create our delightful golden Oreo crust. Take your 2 cups of golden Oreo crum extractbs and place them in a medium bowl. If you don’t have pre-crushed crum extractbs, you can easily make them by pulsing whole golden Oreos in a food processor until they resemble fine crum extractbs. Then, add the 3 tablespoons of melted butter and the 1/4 teaspoon of salt to the crum extractbs. Mix everything together thoroughly until the crum extractbs are evenly moistened. This is key for a crust that holds together well. Press this mixture evenly into the bottom of a 9-inch springform pan. Use the bottom of a glass or a measuring cup to get a nice, compact layer. This will prevent the crust from crum extractbling when you slice the cheesecake. Once pressed, place the pan in the freezer for at least 15 minutes while we prepare the filling. This chilling step helps the crust firm up significantly.
Step 2: Make the White Cheesecake Filling
Now for the creamy white filling! In a large bowl, beat the 2 packages (8 oz each) of softened cream cheese with an electric mixer until it’s completely smooth and free of lumps. Make sure your cream cheese is truly softened – this is crucial for a smooth filling. Gradually add the 2 cups of powdered sugar, beating until well combined and no grainy texture remains. Next, stir in the 2 teaspoons of vanilla extract for that classic cheesecake flavor. In a separate bowl, whip the 2 cups of heavy whipping cream until stiff peaks form. Be careful not to over-whip, as it can turn into butter! Gently fold the whipped cream into the cream cheese mixture until it’s just combined and the filling is light and airy. Don’t overmix at this stage; we want to keep that lovely fluffy texture.
Step 3: Divide and Color the Filling
This is where the patriotic magic begin extracts! We need to divide our white filling to create the red and white layers. Scoop out about half of the white cheesecake filling into a separate bowl. To the remaining white filling in the origin extractal bowl, add the 1 teaspoon of red gel food color. Gel food coloring is great because it’s highly concentrated, meaning you get vibrant colors without adding too much liquid. Mix this thoroughly until you achieve a beautiful, uniform red color. Now you’ll have one bowl of white filling and one bowl of red filling. Set these aside.
Step 4: Prepare the Blue Raspberry Jell-O Layer
For our vibrant blue layer, we’ll use the Jell-O. In a heatproof bowl, combine the 1 package (3.94 oz) of blue raspberry Jell-O with 1 cup of boiling water. Stir vigorously until the Jell-O powder is completely dissolved. This usually takes about 2-3 minutes. Once dissolved, stir in 1 cup of ice-cold water. Let this mixture sit at room temperature for about 15-20 minutes, or until it starts to thicken slightly but is still pourable. We don’t want it to set completely before we pour it.
Step 5: Assemble the Cheesecake Layers
It’s time to assemble our stunning cheesecake! Take your springform pan with the chilled crust out of the freezer. Carefully spoon dollops of the red filling and the white filling over the crust, alternating them. You can use a spoon or a piping bag for more controlled dollops. Once you have the entire base covered with dollops of red and white, gently swirl them together using a toothpick or the tip of a knife. Don’t over-swirl, or the colors will blend too much. Aim for a marbled effect. Now, carefully pour the slightly thickened blue Jell-O mixture evenly over the swirled cream cheese layers. Gently tap the pan on the counter a few times to release any air bubbles. Chill the cheesecake in the refrigerator for at least 6 hours, or preferably overnight, until the filling is completely set and firm.
Step 6: Prepare the Cream Cheese Frosting and Decorate
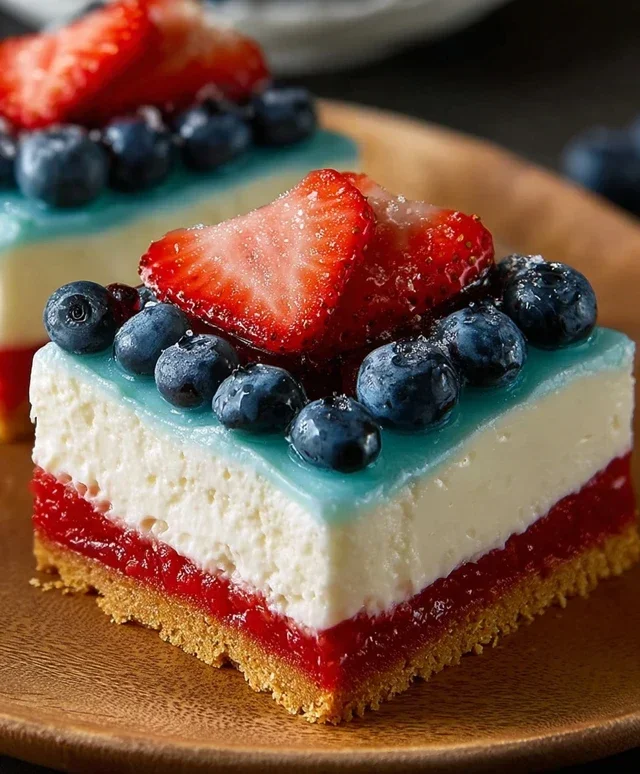
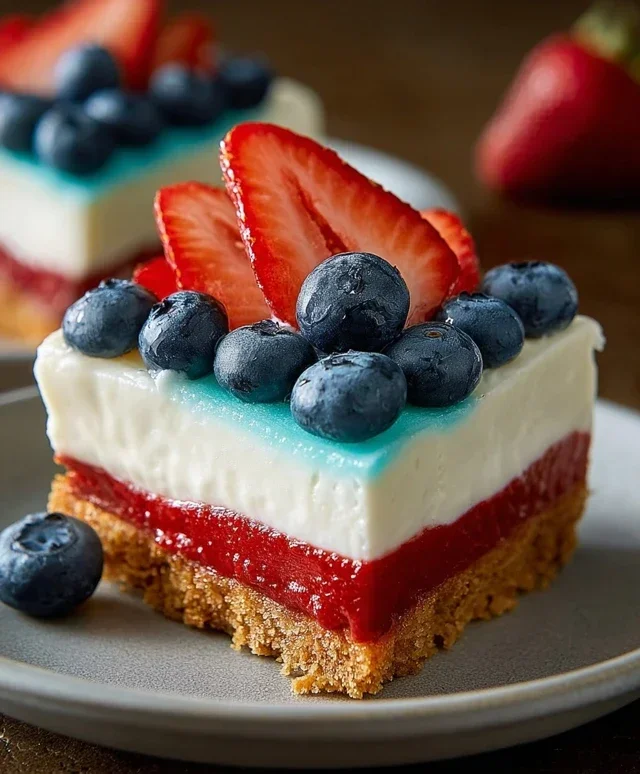
While the cheesecake chills, let’s make a simple, delicious cream cheese frosting to top it off. In a medium bowl, beat the 6 oz of softened cream cheese with the 6 tablespoons of softened butter until smooth and creamy. Gradually add the 3 cups of powdered sugar, mixing until well combined. Stir in the 1 teaspoon of vanilla extract. If the frosting is too thick, you can add a tablespoon of milk or cream at a time until it reaches your desired consistency. Once the cheesecake is fully set, carefully remove the sides of the springform pan. Spread the cream cheese frosting evenly over the top of the cheesecake. Finally, artfully arrange fresh blueberries over the frosting. The white frosting, red filling, and blue blueberries create a beautiful patriotic display. For an extra festive touch, you could add some thinly sliced strawberries or raspberries around the sides as well. Slice and serve this delightful No Bake Patriotic Cheesecake chilled and enjoy the oohs and aahs!
Conclusion:
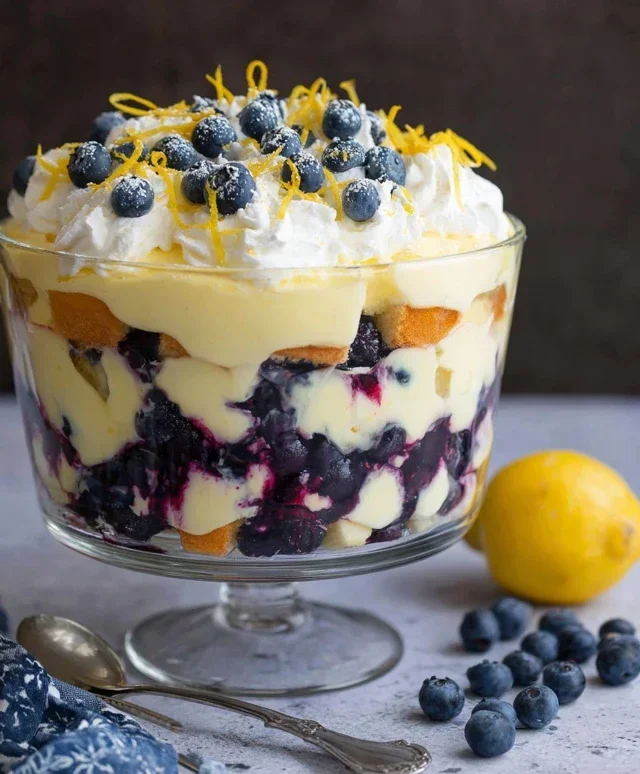
And there you have it – a stunning and delicious No Bake Patriotic Cheesecake perfect for any celebration! This recipe truly shines because it’s incredibly easy to make, requires no oven time, and delivers a decadent, creamy dessert that’s as visually appealing as it is tasty. The vibrant layers of red, white, and blue are sure to be a hit, making it the ideal centerpiece for your Fourth of July cookout, Memorial Day picnic, or any summer gathering. Don’t hesitate to serve this delightful treat with fresh berries, a dollop of whipped cream, or even a drizzle of chocolate sauce for an extra touch of indulgence. If you’re feeling adventurous, you can also experiment with different crust options, like a gin extractgersnap or chocolate cookie crust, or even add a touch of lemon zest to the cheesecake filling for a brighter flavor profile. I truly encourage you to give this No Bake Patriotic Cheesecake a try – it’s guaranteed to impress your guests and become a go-to recipe for festive occasions!
Frequently Asked Questions:
Can I make this cheesecake ahead of time?
Absolutely! This No Bake Patriotic Cheesecake is perfect for making ahead. You can prepare it up to 24 hours in advance and store it in the refrigerator. This allows the flavors to meld beautifully and ensures it’s perfectly chilled and set when you’re ready to serve.
What are some other topping ideas besides berries?
Besides fresh berries, you can get creative with toppings! Consider a swirl of strawberry or raspberry coulis, a sprinkle of star-shaped sprinkles, mini white chocolate chips, or even a dusting of powdered sugar for a snowy effect. A light drizzle of sweetened condensed milk can also add a lovely touch.
Can I use different types of cookies for the crust?
Yes, you can! While grabeef ham crackers are classic, feel free to experiment. Vanilla wafers, shortbread cookies, or even chocolate sandwich cookies would all make delicious crust variations for your No Bake Patriotic Cheesecake.
No Bake Patriotic Cheesecake
A festive and easy no-bake cheesecake layered with red, white, and blue for a perfect patriotic dessert.
Ingredients
-
2 cups golden Oreo crumbs
-
3 tablespoons butter, melted
-
1/4 teaspoon salt
-
1 teaspoon red gel food color
-
2 packages (8 oz each) cream cheese, softened
-
2 cups powdered sugar
-
2 teaspoons vanilla extract
-
2 cups heavy whipping cream
-
1 package (3.94 oz) blue raspberry Jell-O
-
1 cup boiling water
-
6 oz cream cheese, softened
-
6 tablespoons butter, softened
-
3 cups powdered sugar
-
1 teaspoon vanilla extract
-
Fresh blueberries
Instructions
-
Step 1
For the crust: Combine golden Oreo crumbs, melted butter, and salt. Press into the bottom of a 9-inch springform pan. -
Step 2
For the red layer: Dissolve blue raspberry Jell-O in boiling water. Stir in red gel food coloring. Let cool slightly. -
Step 3
In a separate bowl, beat 2 packages (8 oz each) softened cream cheese with 2 cups powdered sugar and 2 teaspoons vanilla extract until smooth. Gradually beat in the cooled Jell-O mixture. -
Step 4
Whip 2 cups heavy whipping cream until stiff peaks form. Gently fold the whipped cream into the cream cheese mixture. -
Step 5
Pour half of the mixture over the crust. Freeze for 30 minutes, or until firm. -
Step 6
For the white layer: Beat 6 oz softened cream cheese with 6 tablespoons softened butter, 3 cups powdered sugar, and 1 teaspoon vanilla extract until smooth and creamy. -
Step 7
Carefully spread the white cheesecake mixture over the frozen red layer. -
Step 8
Pour the remaining red mixture over the white layer. Chill for at least 4 hours, or until set. -
Step 9
Decorate with fresh blueberries before serving.
Important Information
Nutrition Facts (Per Serving)
It is important to consider this information as approximate and not to use it as definitive health advice.
Allergy Information
Please check ingredients for potential allergens and consult a health professional if in doubt.