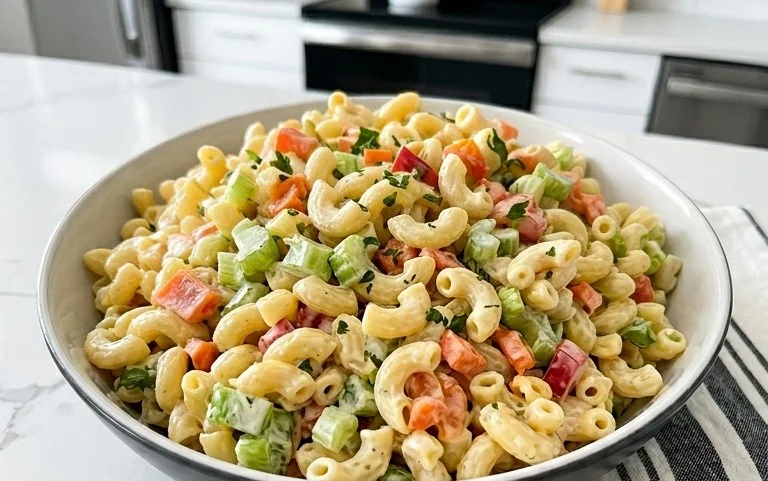
Simple Loaded Potato Skins Recipe-Easy Appetizer
Loading… It’s the ultimate comfort food, the dish that whispers “home” with every bite, and a guaranteed crowd-pleaser. We’re talking about Loading…, that magical concoction that has a way of bringin extractg people together. What is it about Loading… that sparks such joy and nostalgia? Perhaps it’s the perfect balance of textures, from tender to crispy, or the symphony of flavors that dance on your tongue. Maybe it’s the sheer satisfaction of creating something so utterly delicious from scratch. Whatever the reason, Loading… holds a special place in our hearts and stomachs, and today, I’m thrilled to share my go-to recipe that’s sure to become your new favorite. Get ready to experience Loading… like never before!
Loading…
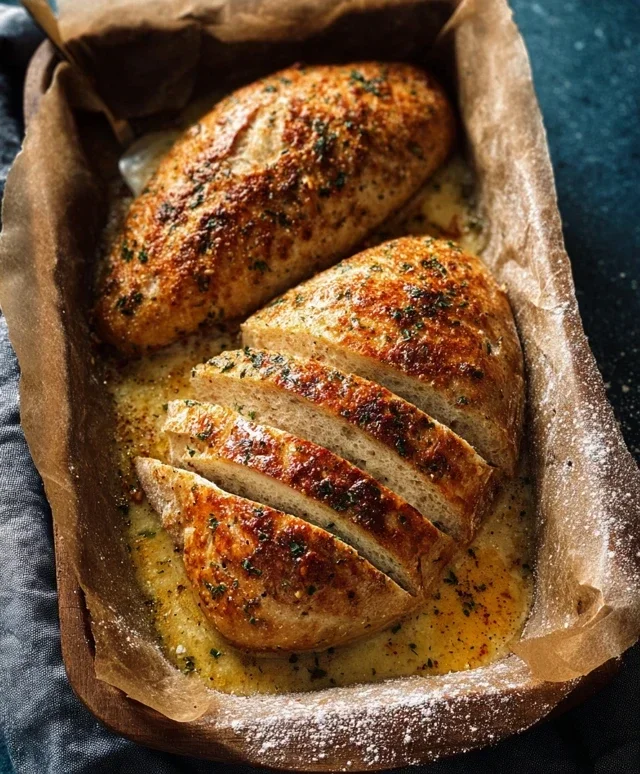
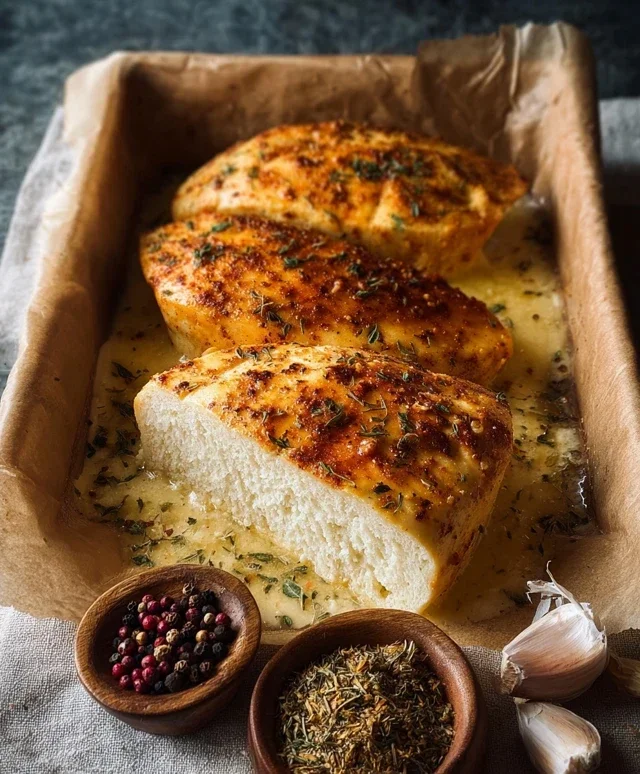
There’s something incredibly satisfying about a perfectly cooked piece of chicken. It’s versatile, universally loved, and with the right approach, it can be a showstopper. Today, we’re diving into a simple yet incredibly effective method for preparing chicken that’s guaranteed to impress. This recipe focuses on creating a beautifully golden-brown exterior with a succulent, juicy interior, all thanks to a few key techniques and, of course, fantastic ingredients. We’ll guide you through each step, ensuring that whether you’re a seasoned home cook or just starting out, you’ll achieve delicious results. Get ready to elevate your chicken game!
Ingredients:
Preparation is Key
Before we even think about heat, the way we prepare our chicken makes a significant difference. Our first crucial step is to ensure the chicken is completely dry. Take your chicken breasts and, using paper towels, thoroughly pat them dry on all sides. This might seem like a small detail, but it’s incredibly important for achieving that desirable crispy, golden-brown crust. Moisture on the surface of the meat will steam rather than sear, preventing that beautiful color and texture we’re aiming for. Once dry, we’ll season generously. In a small bowl, combine the kosher salt, black pepper, garlic powder, and paprika. Sprinkle this mixture evenly over both sides of the chicken breasts, pressing it gently into the meat so it adheres well. This blend of seasonings provides a savory foundation that complements the chicken beautifully.
The Searing Process
Now it’s time to bring the heat. We’ll be pan-searing our chicken to lock in those juices and create that delightful exterior. Heat your olive oil in a large, oven-safe skillet (cast iron is ideal here if you have it) over medium-high heat. You want the oil to be shimmering, but not smoking. Carefully place the seasoned chicken breasts into the hot skillet. Be sure not to overcrowd the pan; cook in batches if necessary to ensure each piece has ample space. Overcrowding will lower the pan temperature, leading to steaming rather than searing.
Cooking to Perfection
Once the chicken is in the skillet, resist the urge to move it immediately. Let it sear undisturbed for about 4-5 minutes per side. This initial sear is what builds that gorgeous crust. You’ll see the edges start to turn golden brown. After the initial sear, you can gently move the chicken to get a full view of the browning. If your chicken breasts are particularly thick, you might want to finish them in the oven to ensure they cook through evenly without drying out the exterior. For this, preheat your oven to 375°F (190°C). After searing both sides in the skillet, transfer the skillet (if oven-safe) or the chicken breasts to a baking sheet and into the preheated oven.
Ensuring Safety and Juiciness
This is where precision truly matters. We want our chicken to be cooked through for safety, but we don’t want to overcook it to the point of dryness. The best way to achieve this is with a reliable meat thermometer. Insert the thermometer into the thickest part of the chicken breast. Our target temperature is 165°F (74°C). Keep a close eye on the thermometer and remove the chicken from the oven (or pan if not using the oven) as soon as it reaches this temperature. Remember that the internal temperature will continue to rise slightly as it rests.
The Crucial Resting Period
The final step, and arguably one of the most important, is allowing the chicken to rest. Once you’ve removed the chicken from the heat, place it on a clean cutting board and let it sit for about 5 minutes. This resting period is absolutely vital. When chicken cooks, the muscle fibers contract, pushing the juices towards the center. If you cut into it immediately, all those delicious juices will run out onto the plate, leaving you with dry chicken. By letting it rest, you allow those juices to redistribute throughout the meat, resulting in a much more tender and succulent bite. You can loosely tent it with foil to keep it warm.
Once rested, your perfectly cooked chicken is ready to be sliced and served. You can serve it whole, or for a more elegant presentation, slice it against the grain. Garnish with fresh herbs if desired for a pop of color and fresh aroma. This simple method, with its emphasis on proper preparation, searing, temperature control, and resting, will consistently deliver delicious, juicy chicken every time. Enjoy!
Conclusion:
I hope you’re as excited about making this ‘Loading…’ recipe as I am about sharing it! This dish truly stands out because it’s incredibly versatile, surprisingly simple to prepare, and delivers fantastic flavor with minimal fuss. Whether you’re a seasoned home cook or just starting out, you’ll find success with this recipe. It’s the perfect centerpiece for a weeknight dinner or an impressive appetizer for guests. Don’t be afraid to experiment! Consider adding different herbs, spices, or even a splash of your favorite sauce to truly make it your own. I highly encourage you to gather your ingredients and give this ‘Loading…’ a try – I promise you won’t be disappointed. The satisfaction of creating something delicious from scratch is unparalleled!
Frequently Asked Questions:
Can I make this recipe ahead of time?
Absolutely! Many components of this ‘Loading…’ recipe can be prepared in advance. For instance, you can chop vegetables, mix dry ingredients, or even pre-cook certain elements. This will significantly cut down on your preparation time when you’re ready to assemble and cook the final dish. Just be mindful of ingredients that might lose their texture or freshness if stored for too long.
What are some good serving suggestions for this ‘Loading…’ dish?
This ‘Loading…’ is wonderfully adaptable. It pairs beautifully with a crisp green salad, fluffy rice, or crusty bread for soaking up any delicious sauces. For a heartier meal, consider serving it alongside roasted vegetables or a creamy mash. If you’re serving it as an appetizer, small portions are perfect with toothpicks or small serving spoons.
Are there any ways to make this recipe spicier?
Definitely! To add a kick to your ‘Loading…’, you can incorporate ingredients like chopped fresh chili peppers, a pinch of cayenne pepper, or a dash of hot sauce into the mixture. You could also serve it with a spicy aioli or a dollop of sriracha on the side for those who prefer extra heat.
Tender and Juicy Chicken
A simple yet effective method for preparing succulent chicken, focusing on proper preparation and cooking techniques.
Ingredients
-
Chicken pieces (e.g., thighs, breasts)
-
Salt
-
Black pepper
-
Garlic powder
-
Olive oil
-
Fresh herbs (optional)
Instructions
-
Step 1
Start by patting the chicken dry; this helps the seasoning stick better. -
Step 2
Season the chicken generously with salt, black pepper, and garlic powder. You can also add a drizzle of olive oil. -
Step 3
Cook the chicken using your preferred method (baking, pan-searing, grilling) until it’s golden brown and cooked through. -
Step 4
Use a meat thermometer to check that your chicken reaches 165°F (74°C). This ensures it’s safe to eat, yet still tender. -
Step 5
Let the chicken rest for about 5 minutes after cooking. This lets the juices redistribute, making each bite more succulent.
Important Information
Nutrition Facts (Per Serving)
It is important to consider this information as approximate and not to use it as definitive health advice.
Allergy Information
Please check ingredients for potential allergens and consult a health professional if in doubt.